¶ NitroX Tracker (Script) Enablement Guide
¶ Overview
This document provides step-by-step instructions for enabling the Nitro Tracker app extension on your Shopify store after installing the NitroX Shopify app.
Once enabled, the Nitro Tracker automatically loads the Nitro script on your storefront, allowing Nitro to track visitor activity and capture user events. You can verify the integration by checking the latest events in the Live tab of the NitroX dashboard.
¶ Step 1: Open the Shopify Theme Editor
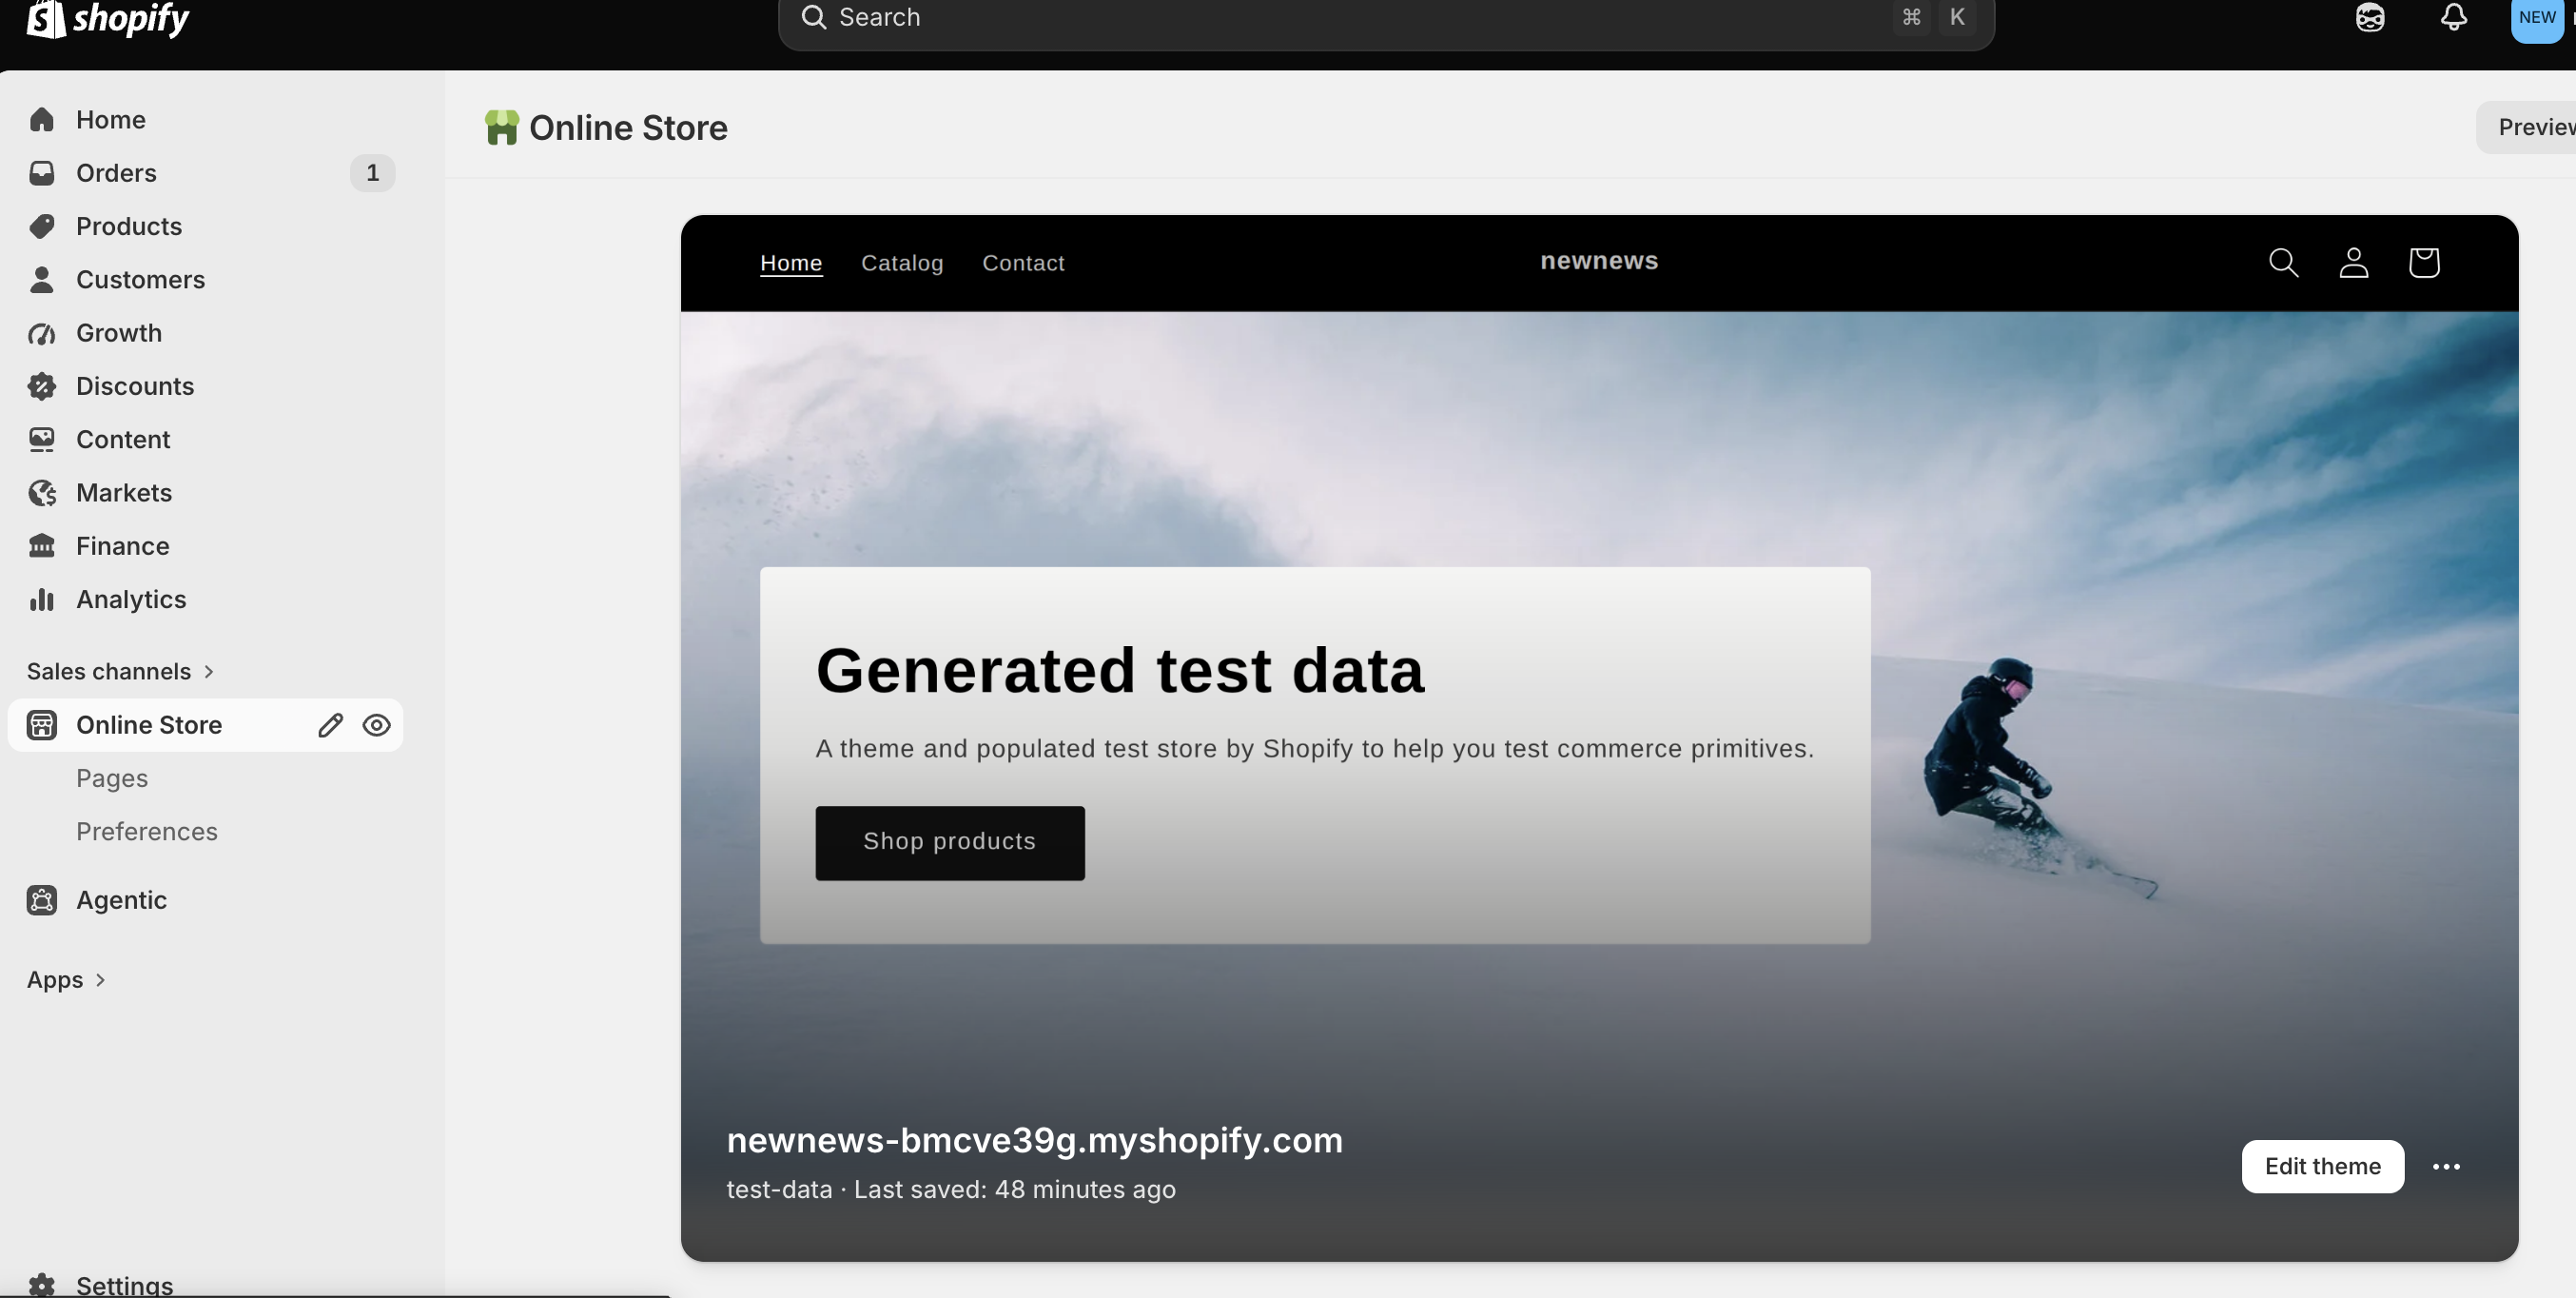
- Log in to your Shopify Store Admin.
- From the left navigation bar, go to Online Store.
- On the Online Store page, click Edit theme.
¶ Step 2: Open App Embeds
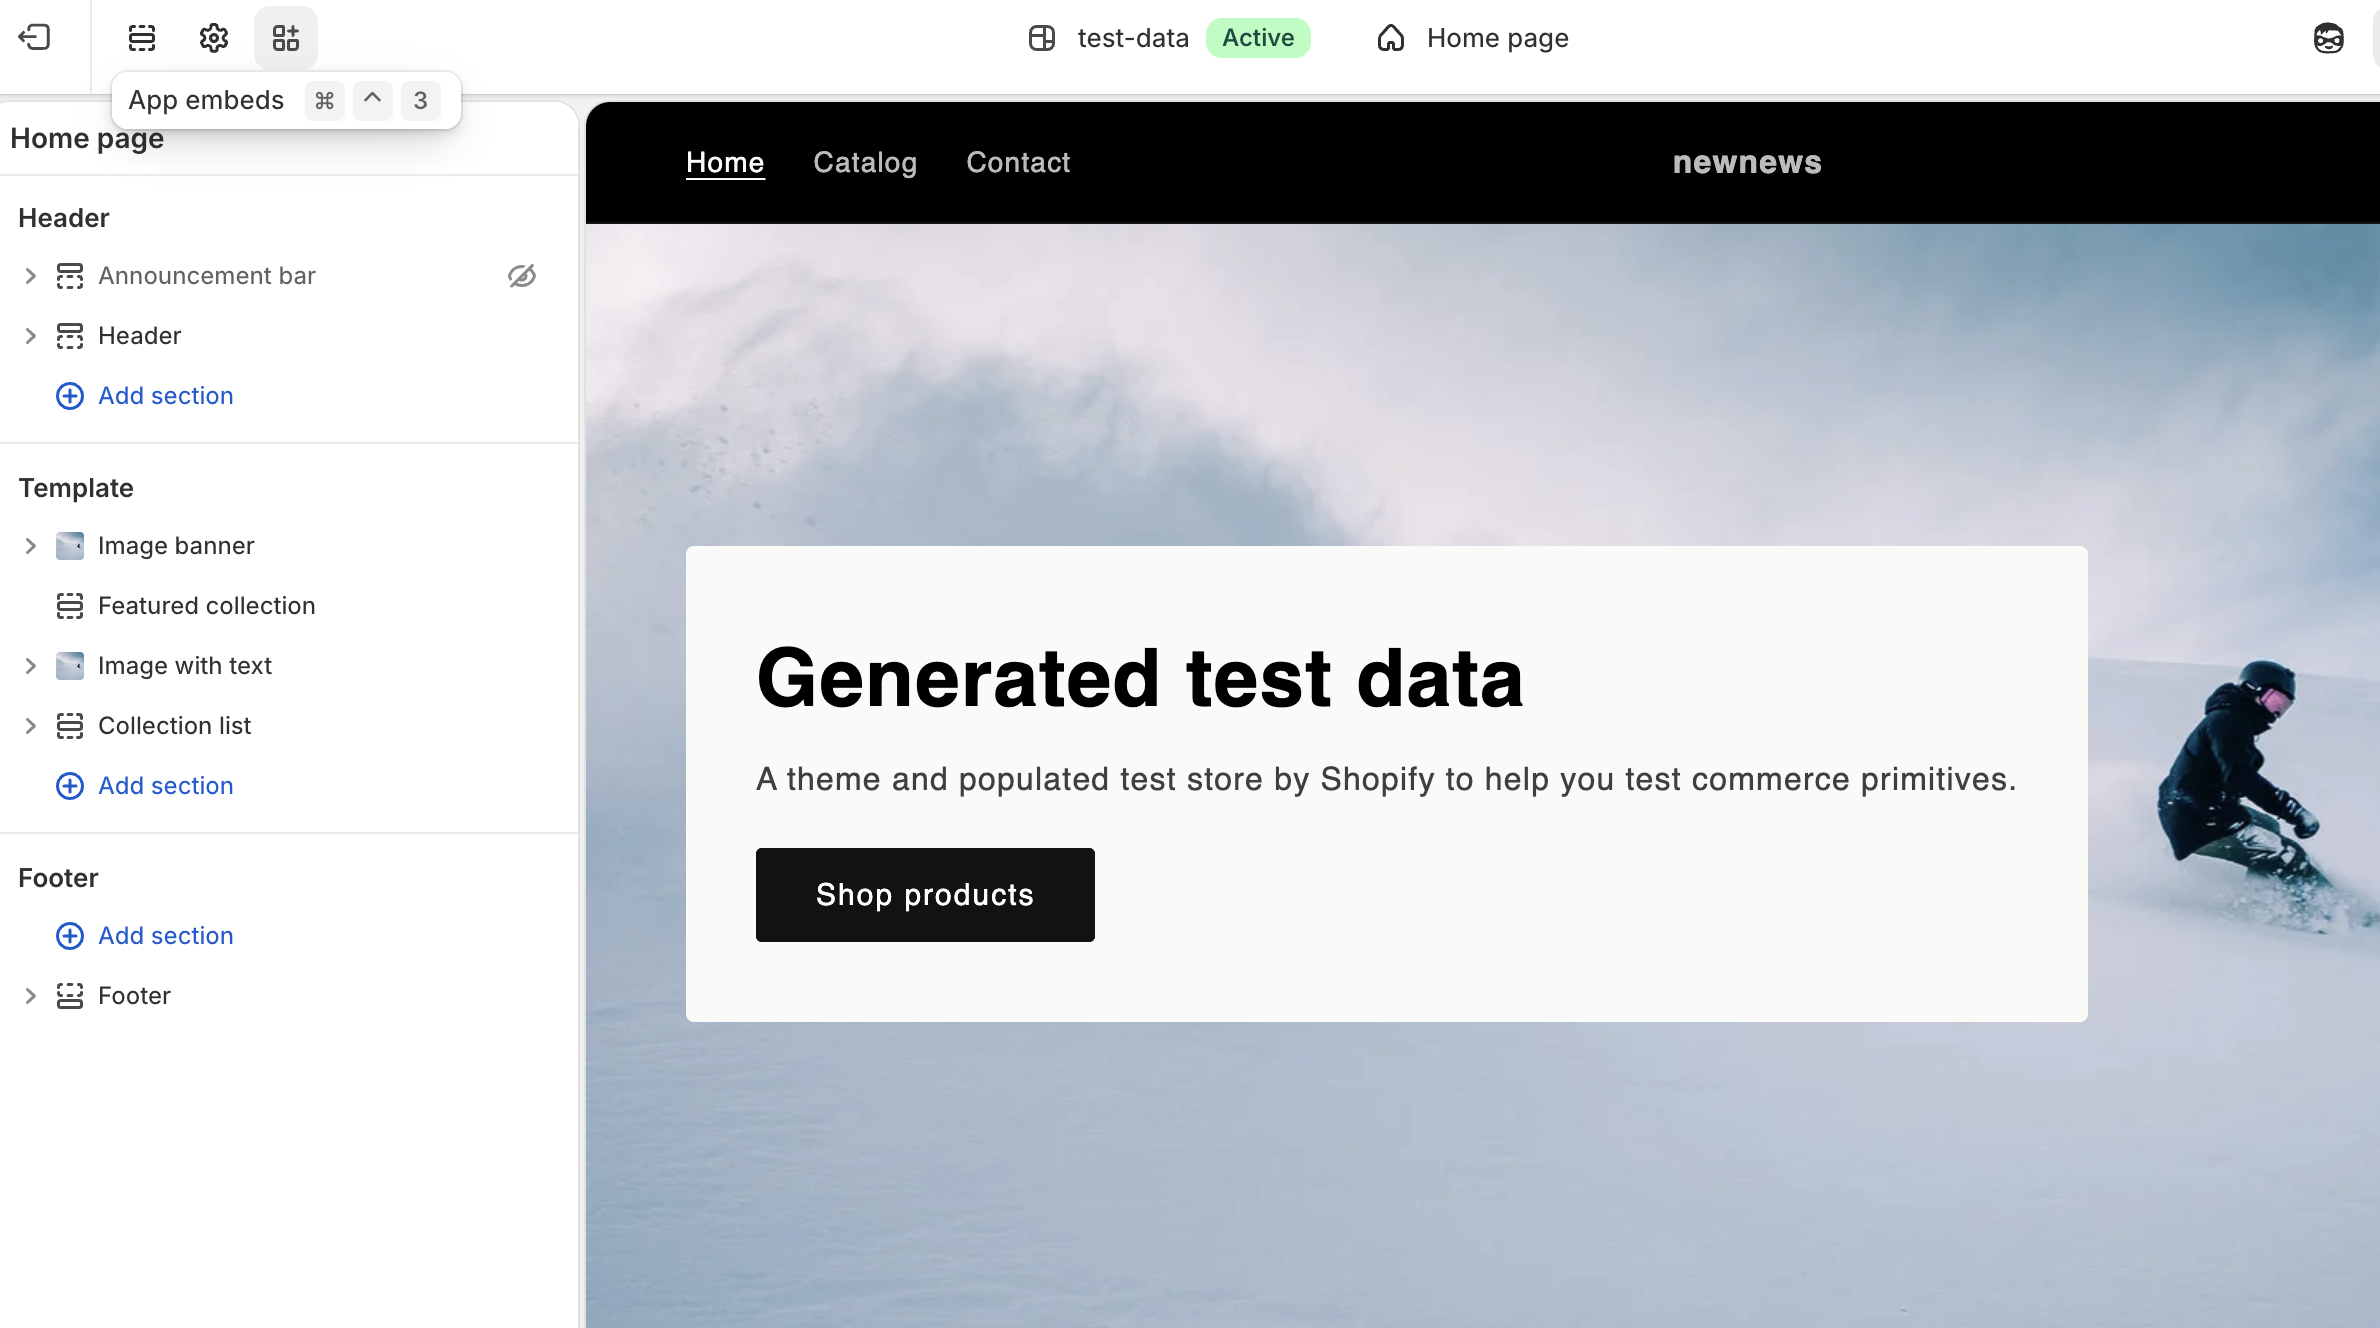
- The Theme Editor will open.
- From the top-left corner, click the App embeds icon.
¶ Step 3: Enable Nitro Tracker
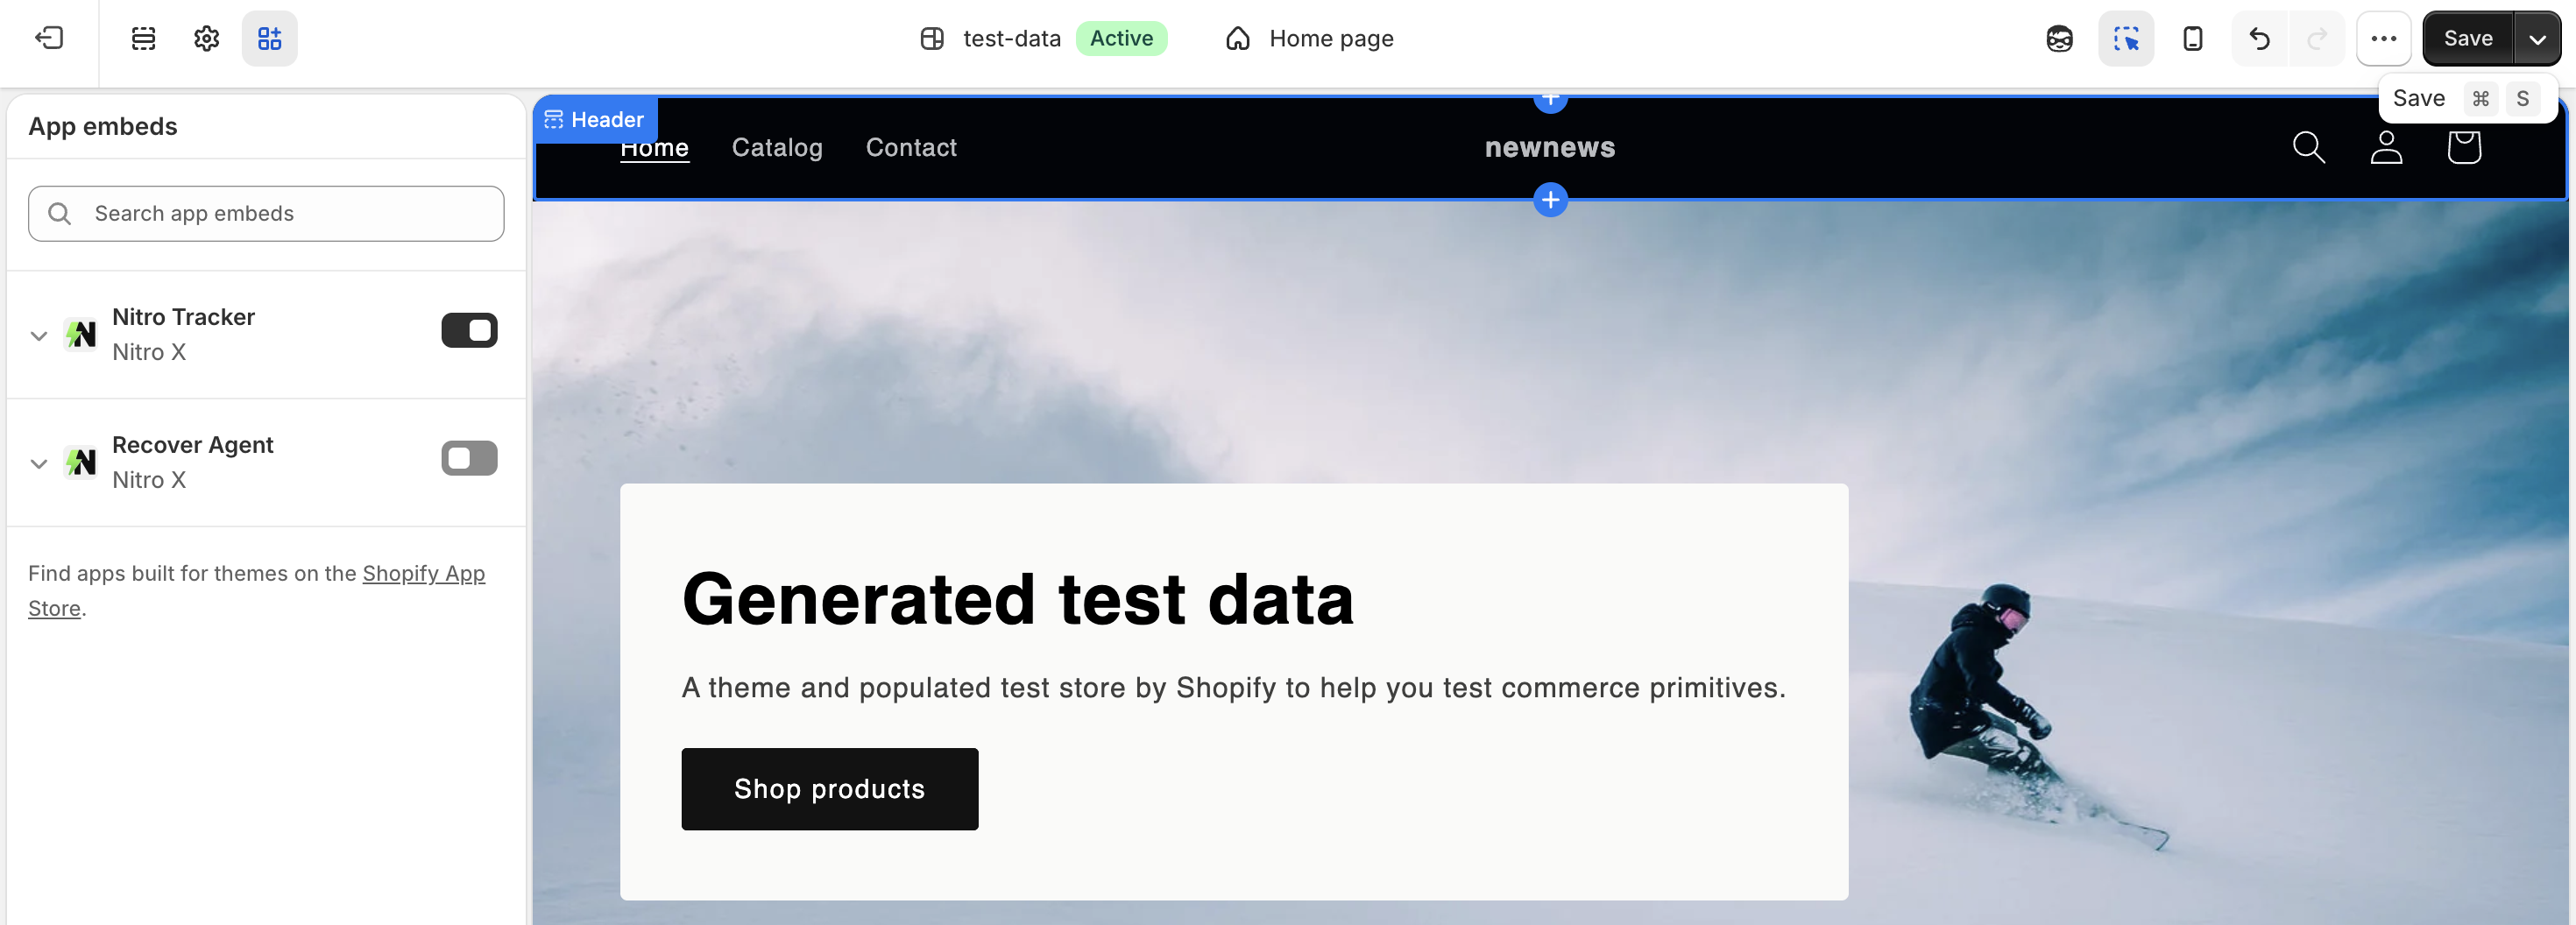
- In the App embeds section, search for Nitro Tracker.
- Enable the Nitro Tracker toggle.
- From the top-right corner, click Save to save the changes to your theme.
¶ Step 4: Verify Nitro Tracker Enablement
- Visit your Shopify storefront.
- Nitro should now start loading on your website.
- Open the NitroX dashboard.
- Navigate to the Live tab.
- Verify that the latest user events are being captured.
Note: It may take up to 5–6 minutes for events to start appearing in the NitroX dashboard.