¶ Nitro<>Zoho Integration Guide
¶ What you'll need
- Client ID
- Client Secret
- Generated Code
- Layout ID
¶ Steps to get Layout ID
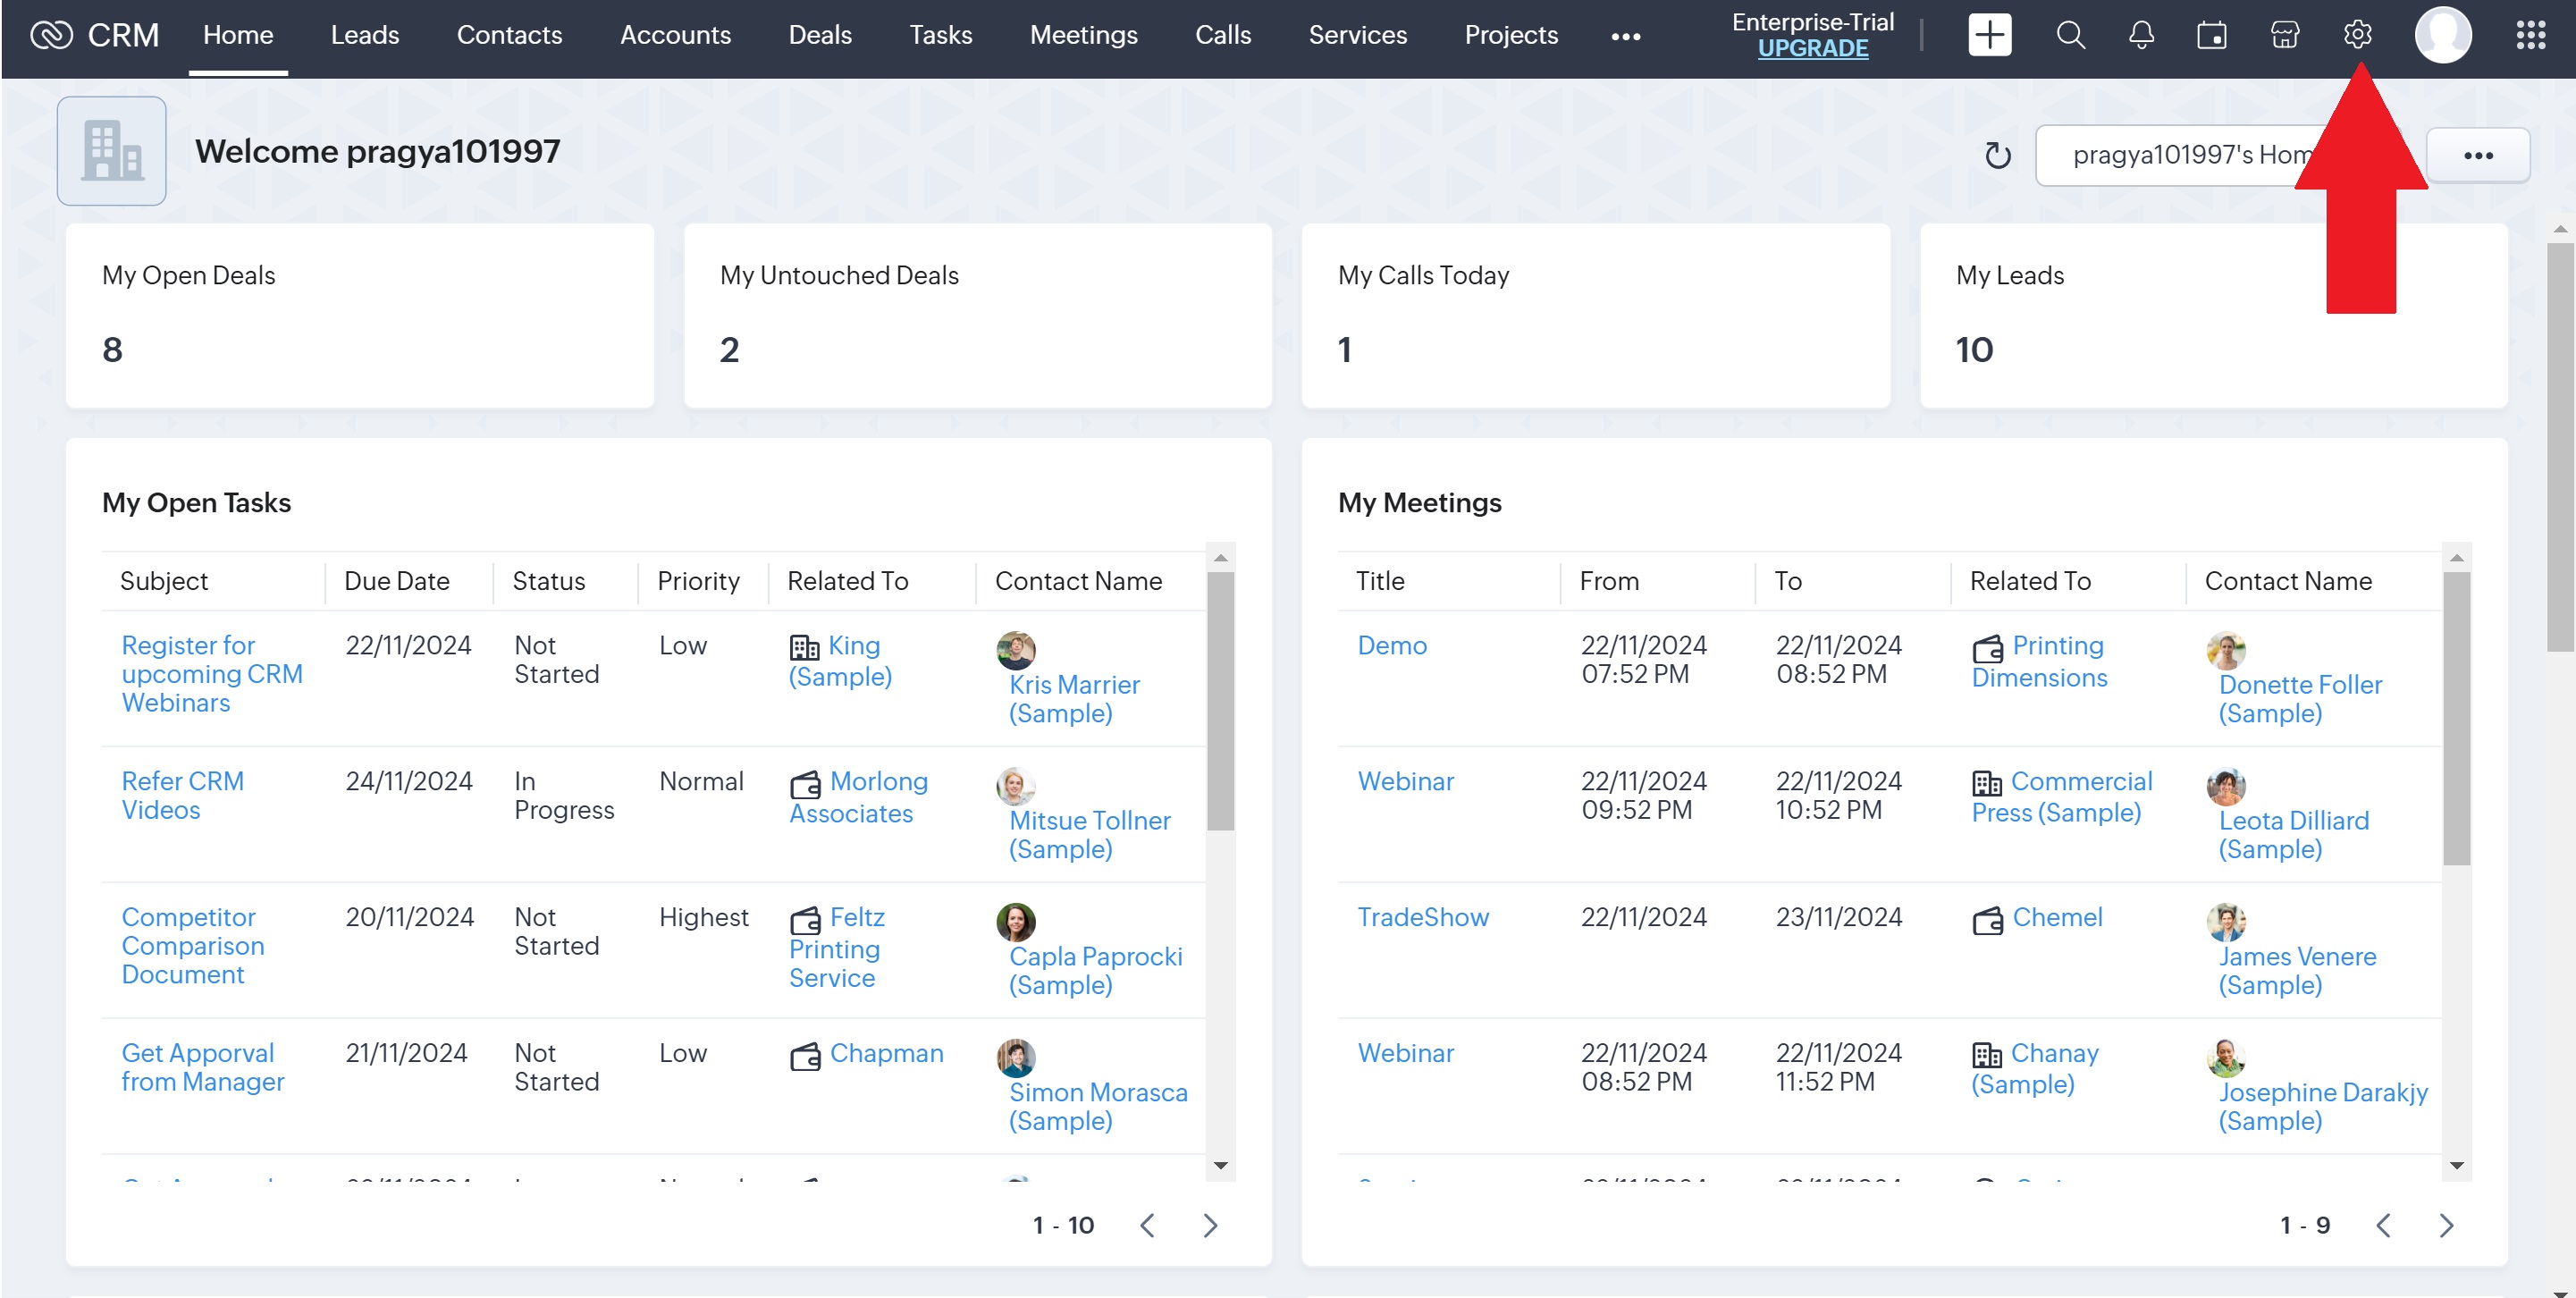
- Visit https://crm.zoho.in and go to the home tab on your zoho dashboard.
Now click on Setup option present in the top right corner.
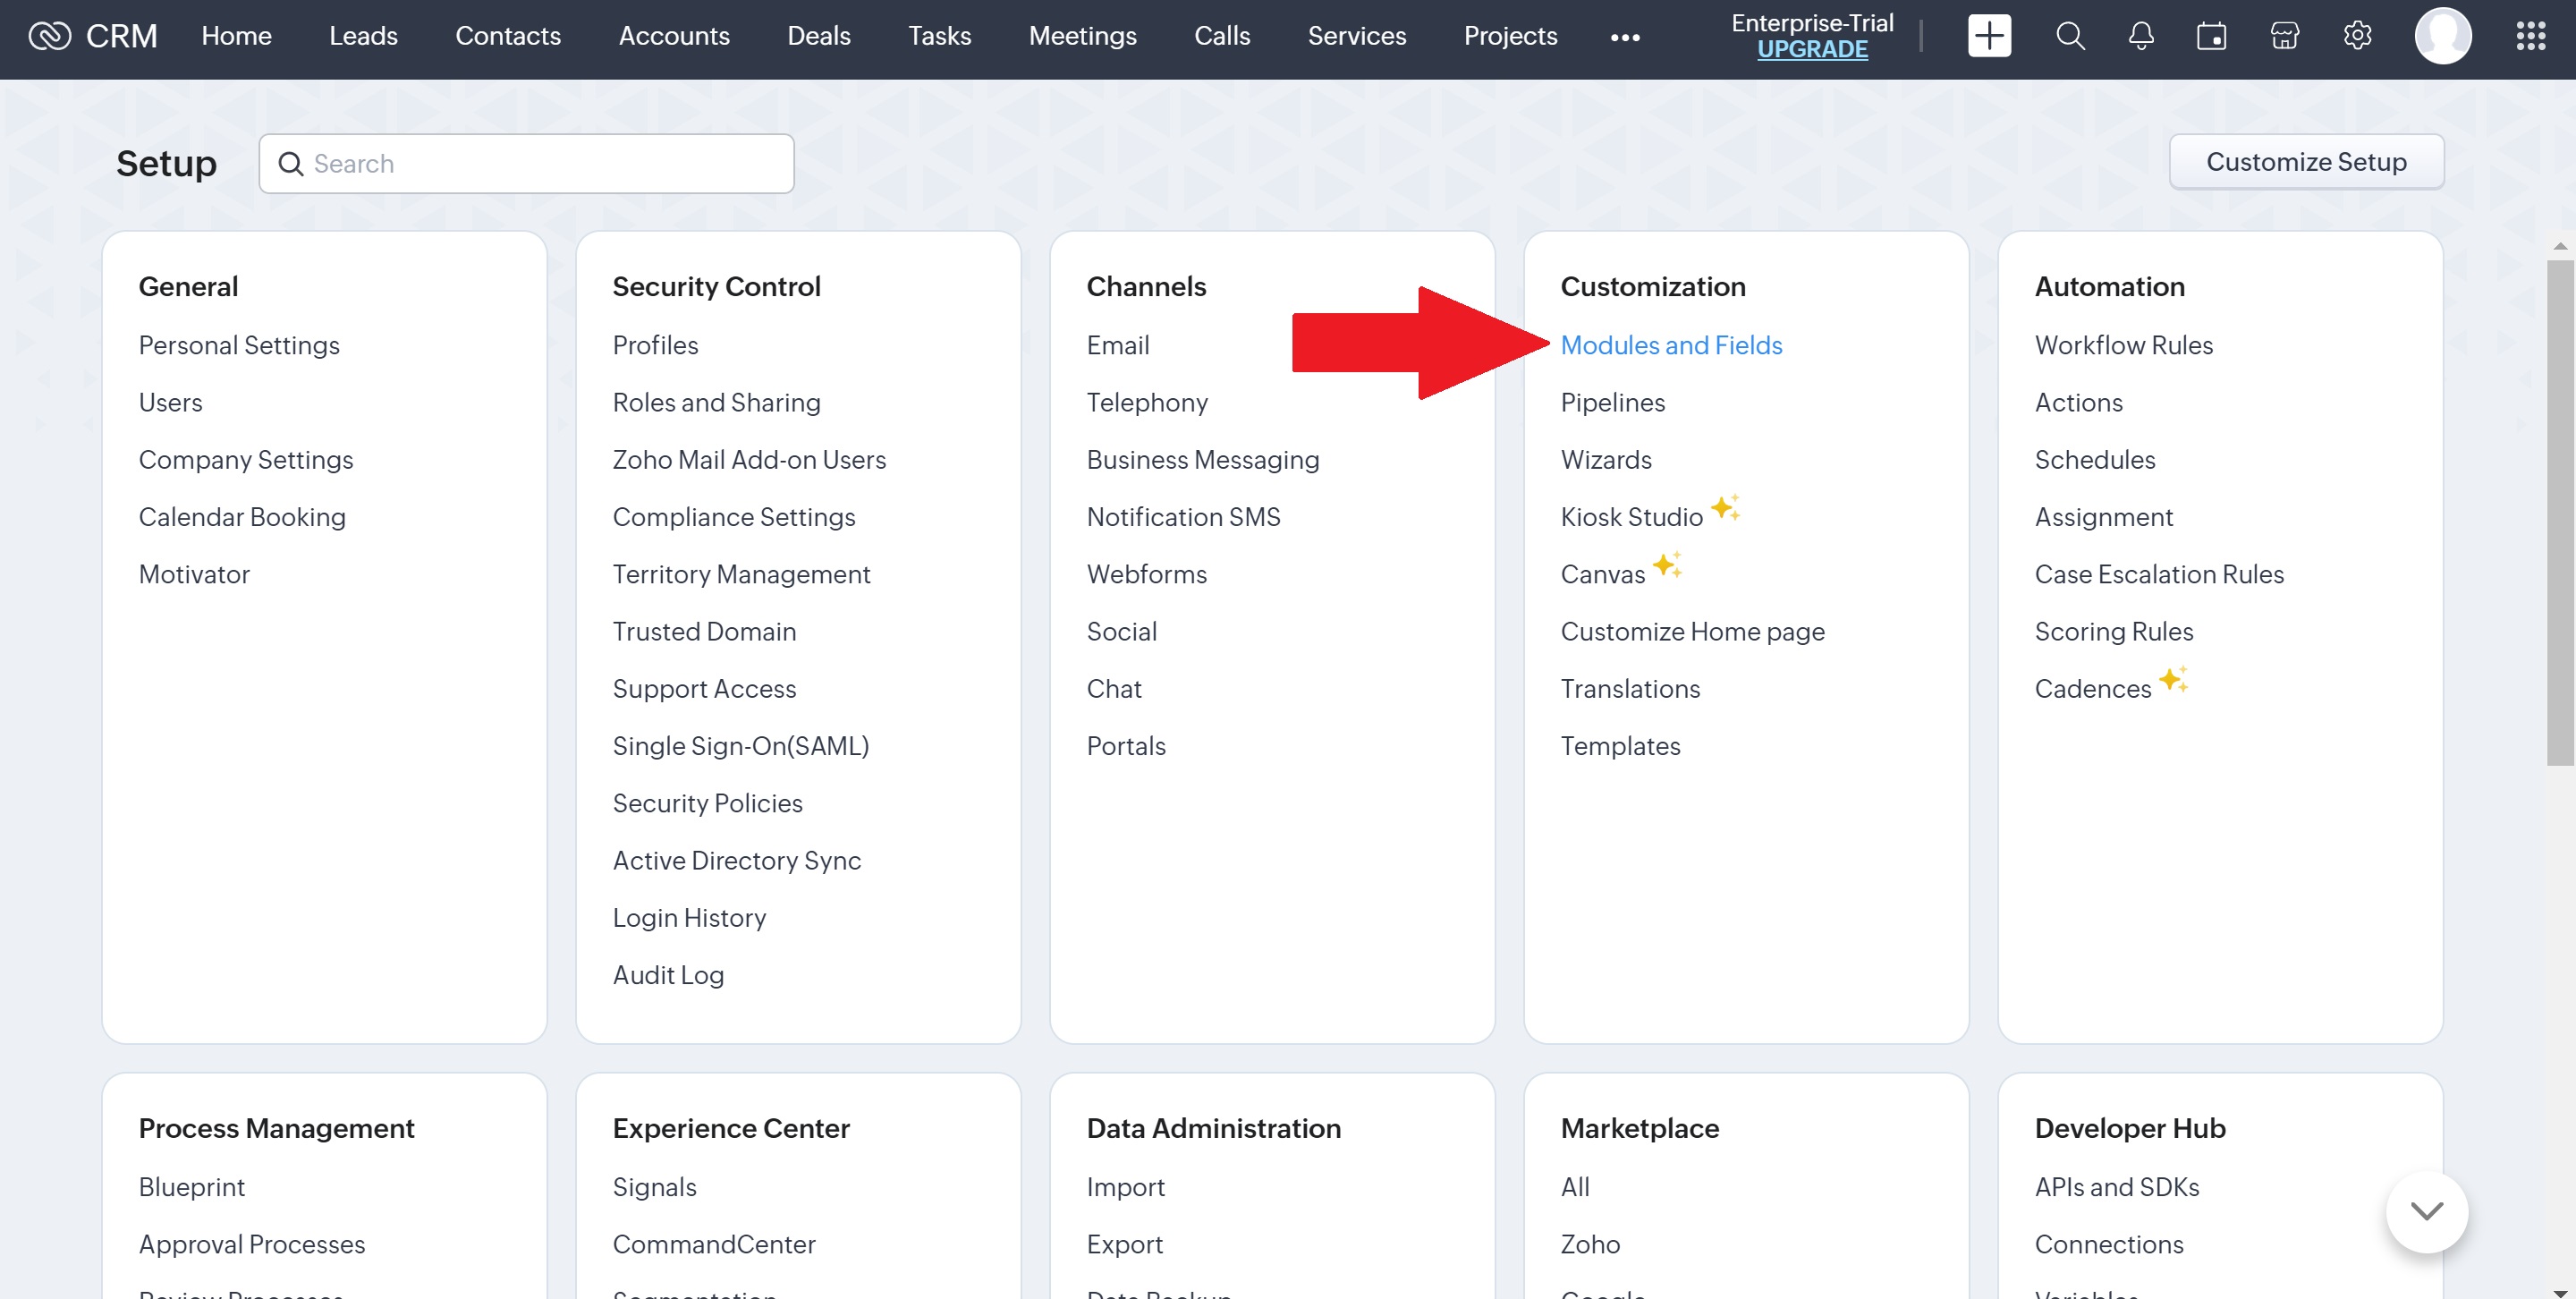
- On the Setup page, click on "Modules and Fields" under the Customization menu.
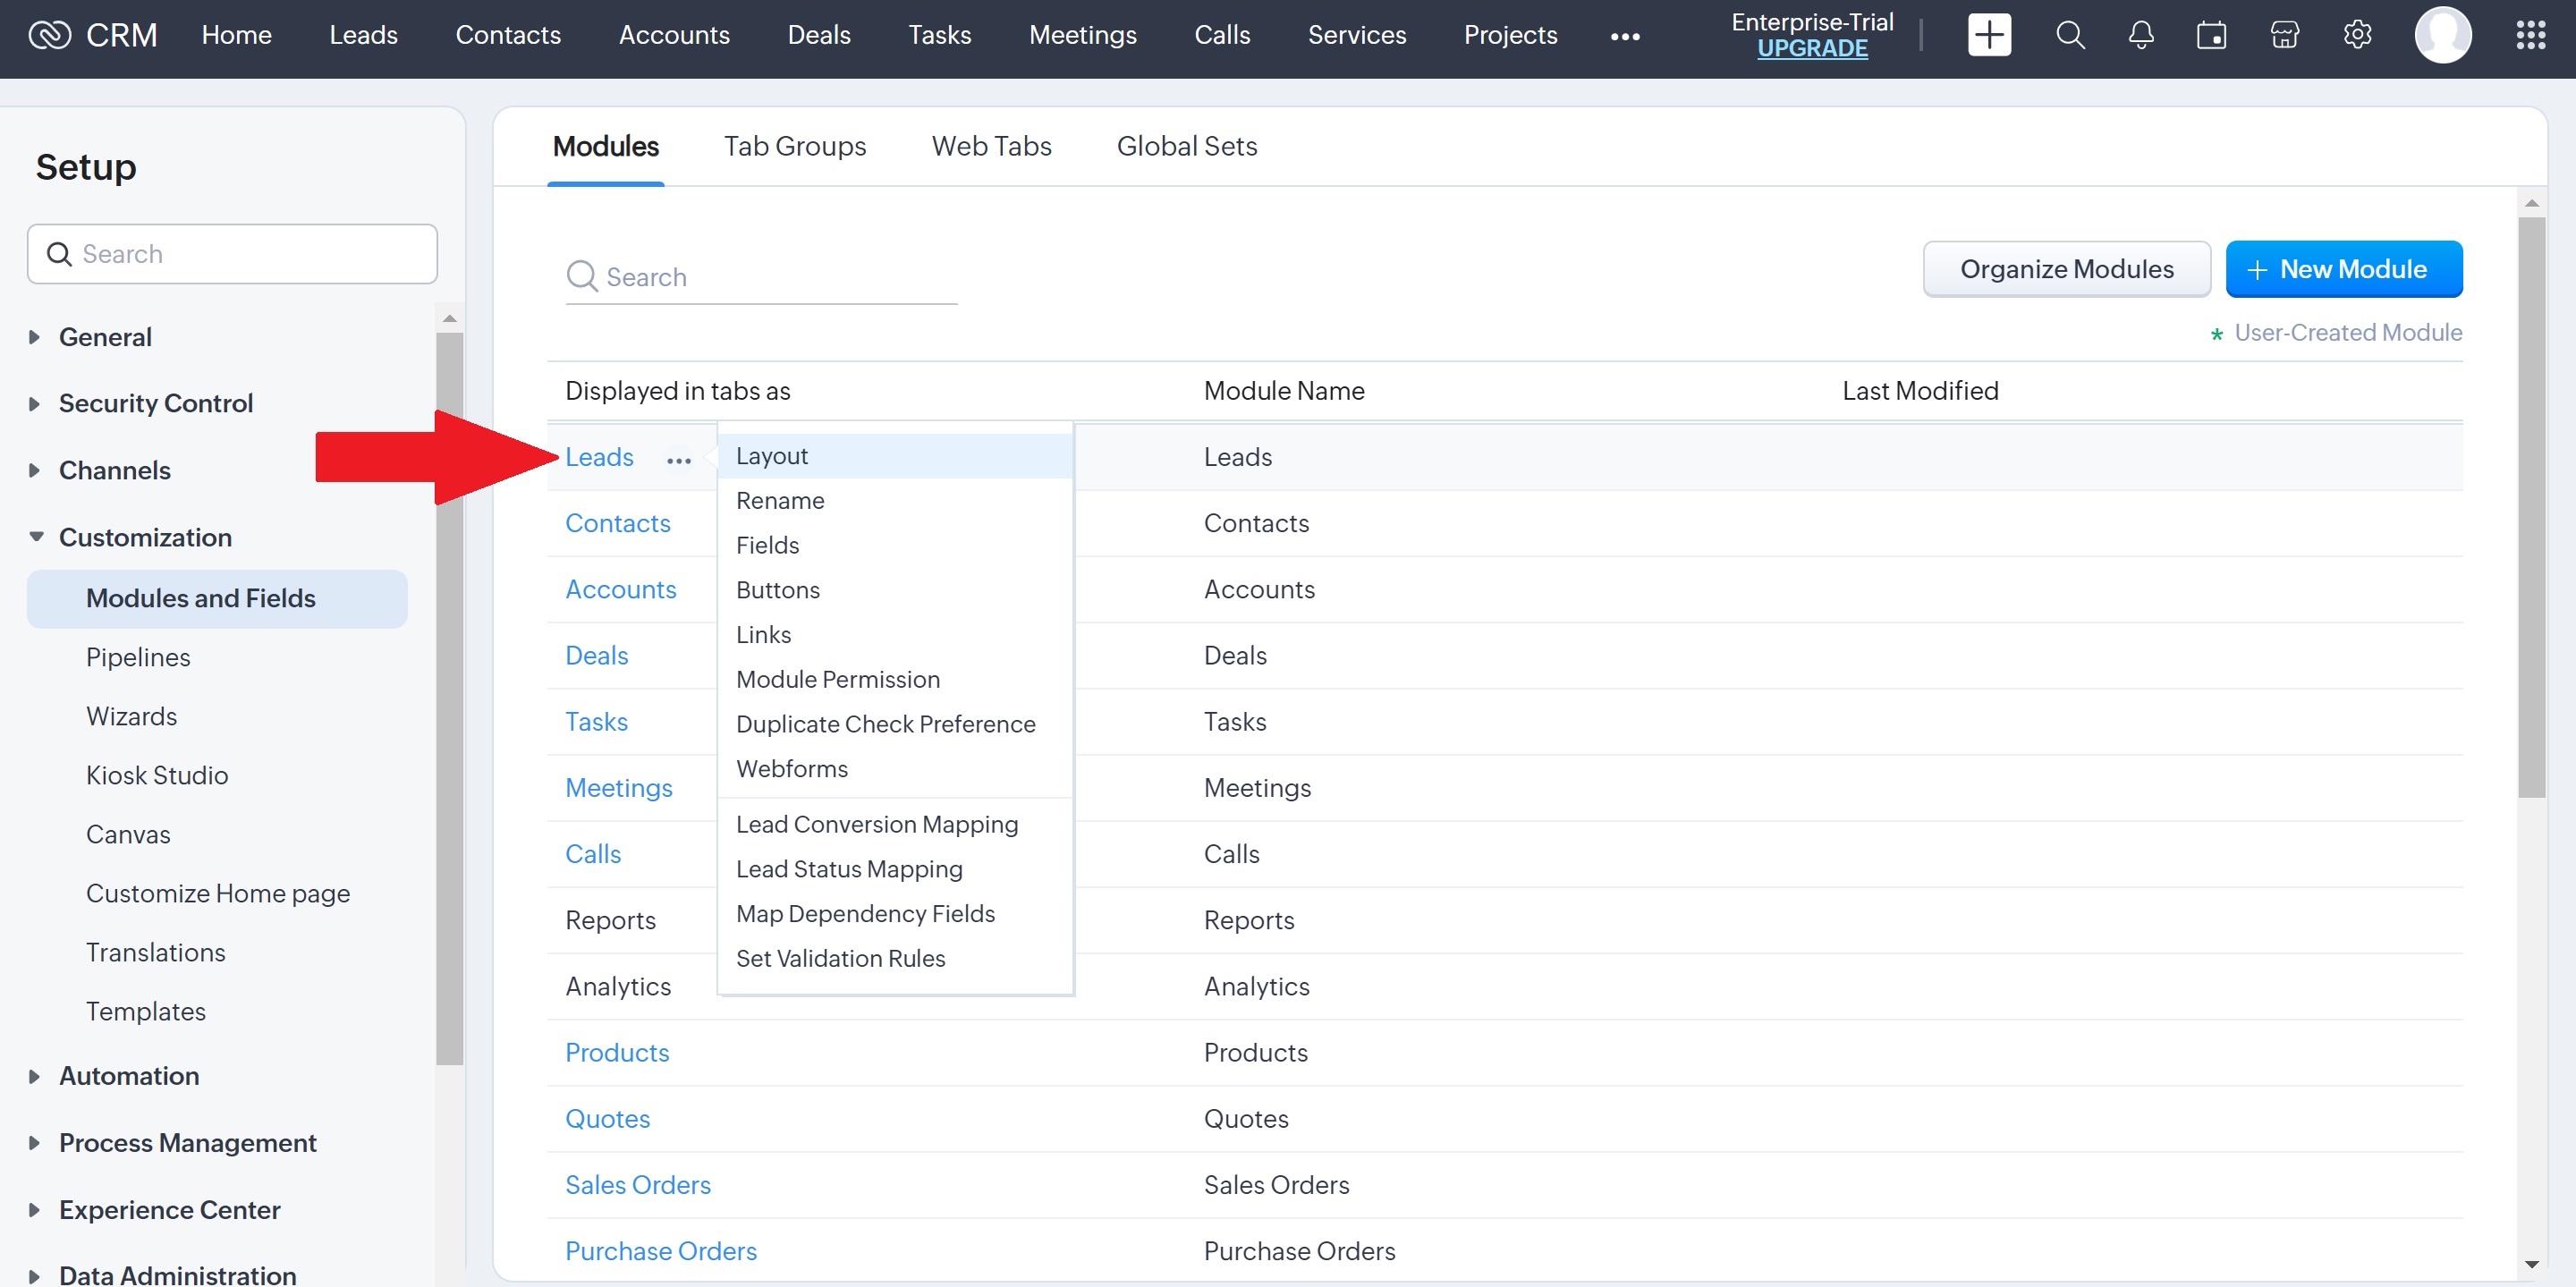
- Now go to modules tab and click on Leads option.
Select Layout option under the leads menu.
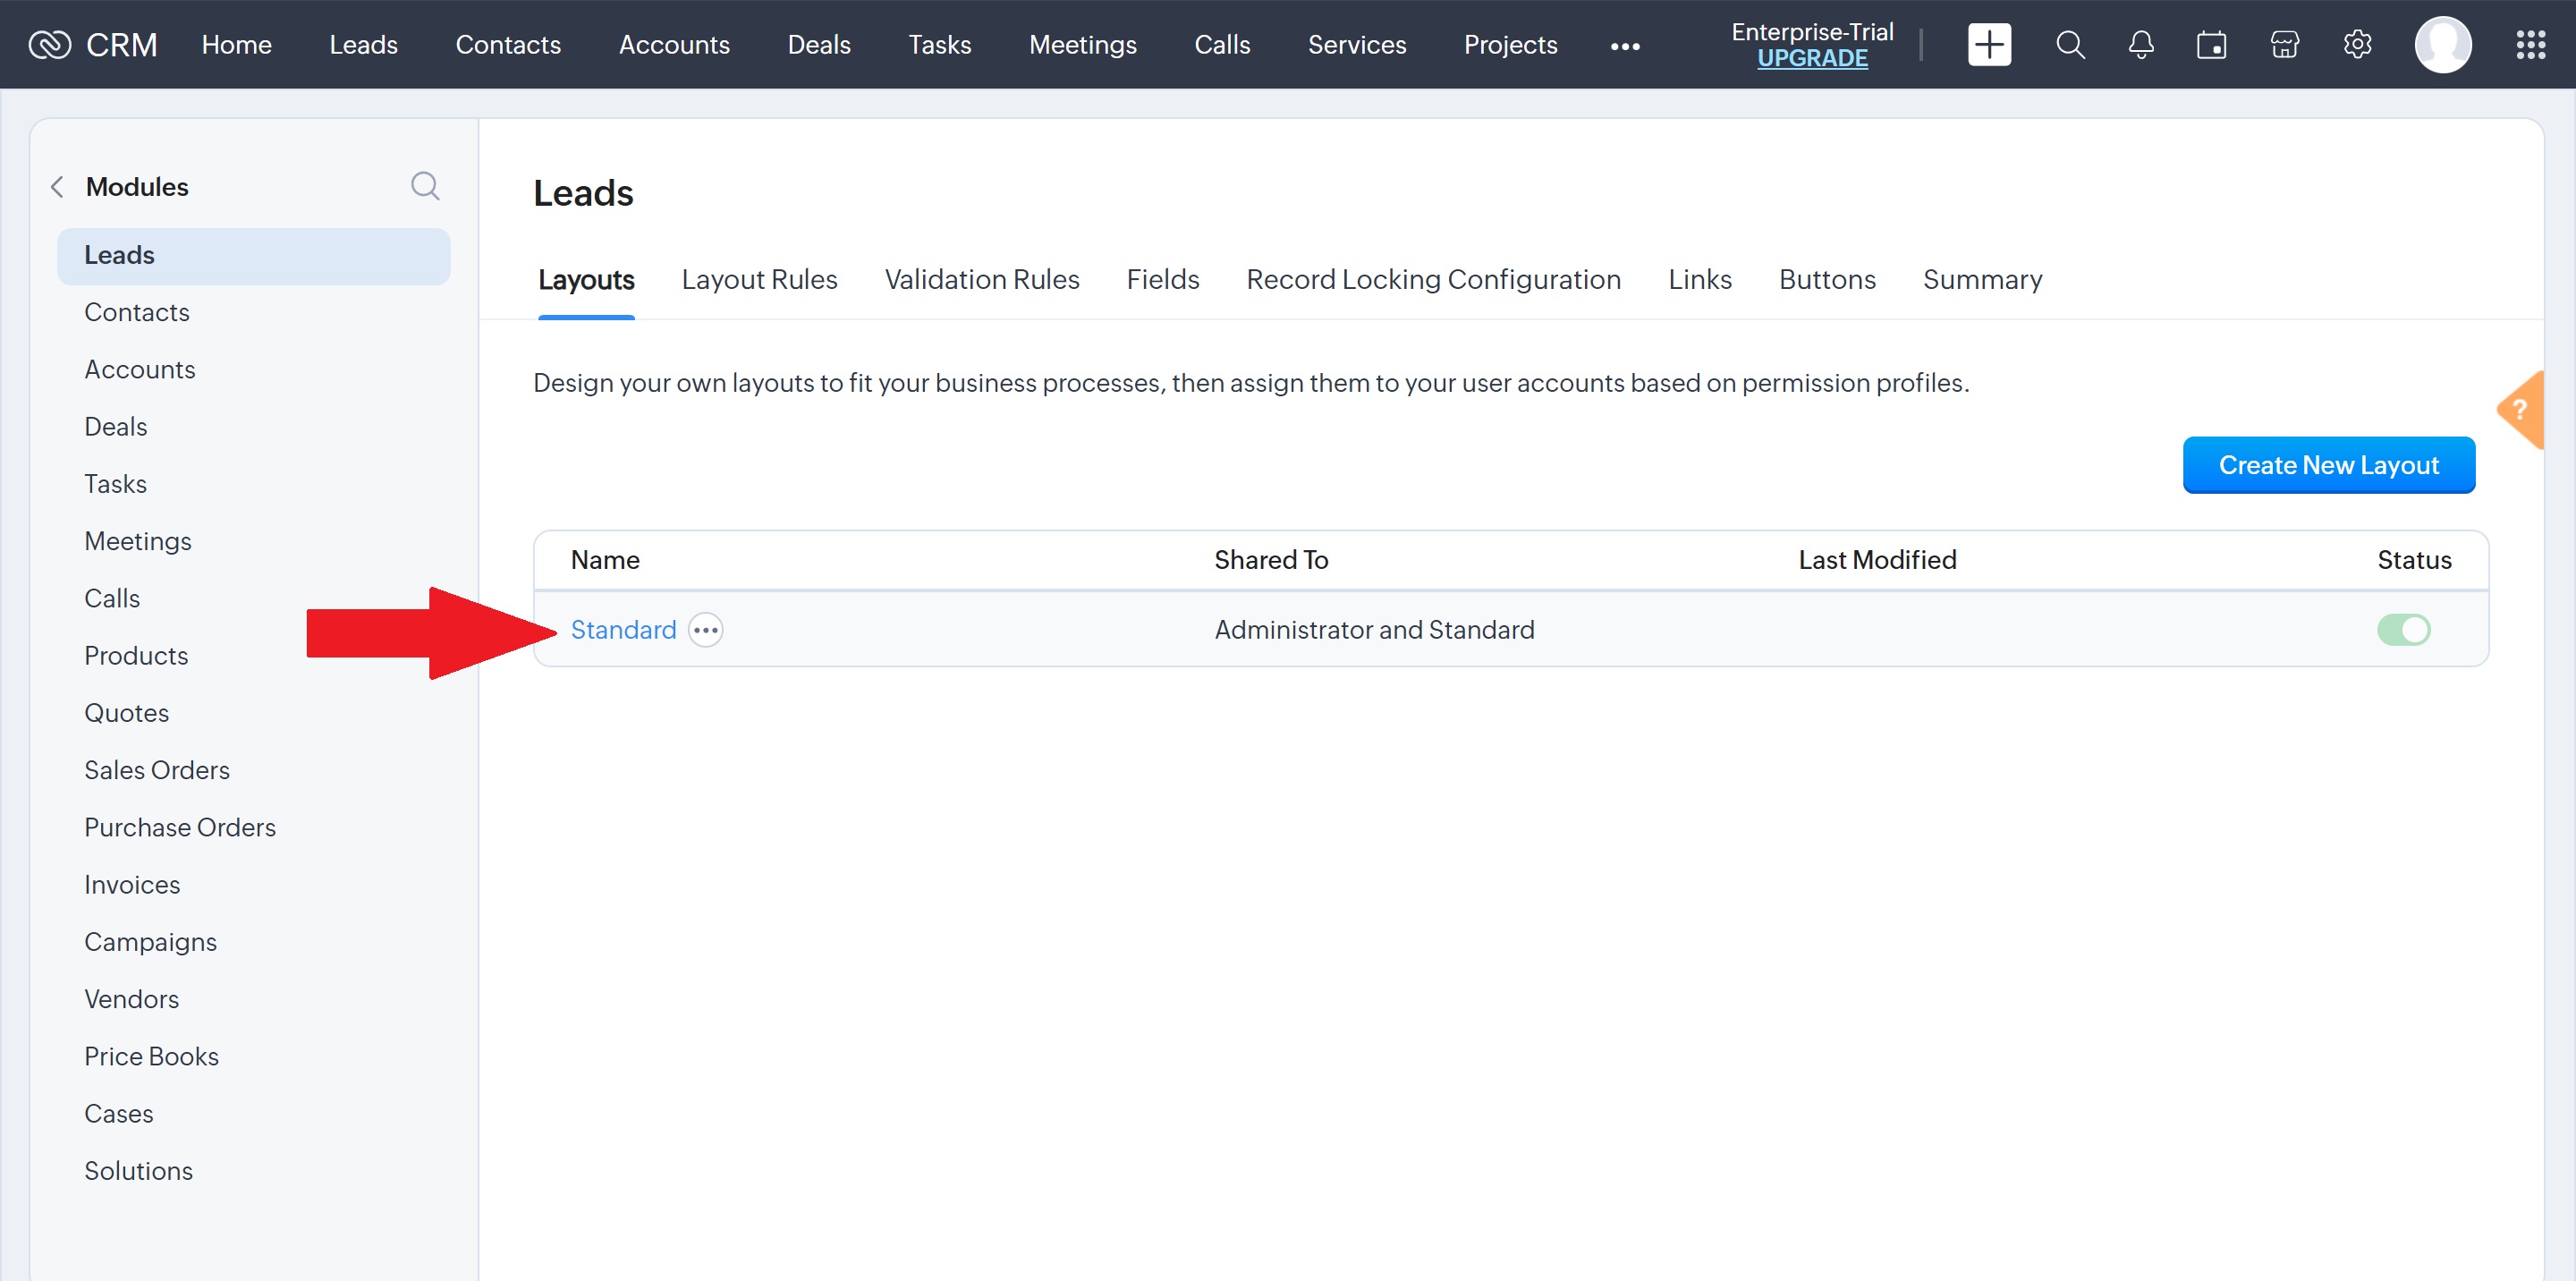
- Leads page will open up. Now choose a layout for your Nitro leads.
(leads from Nitro will appear on your Zoho dashboard in the selected layout format)
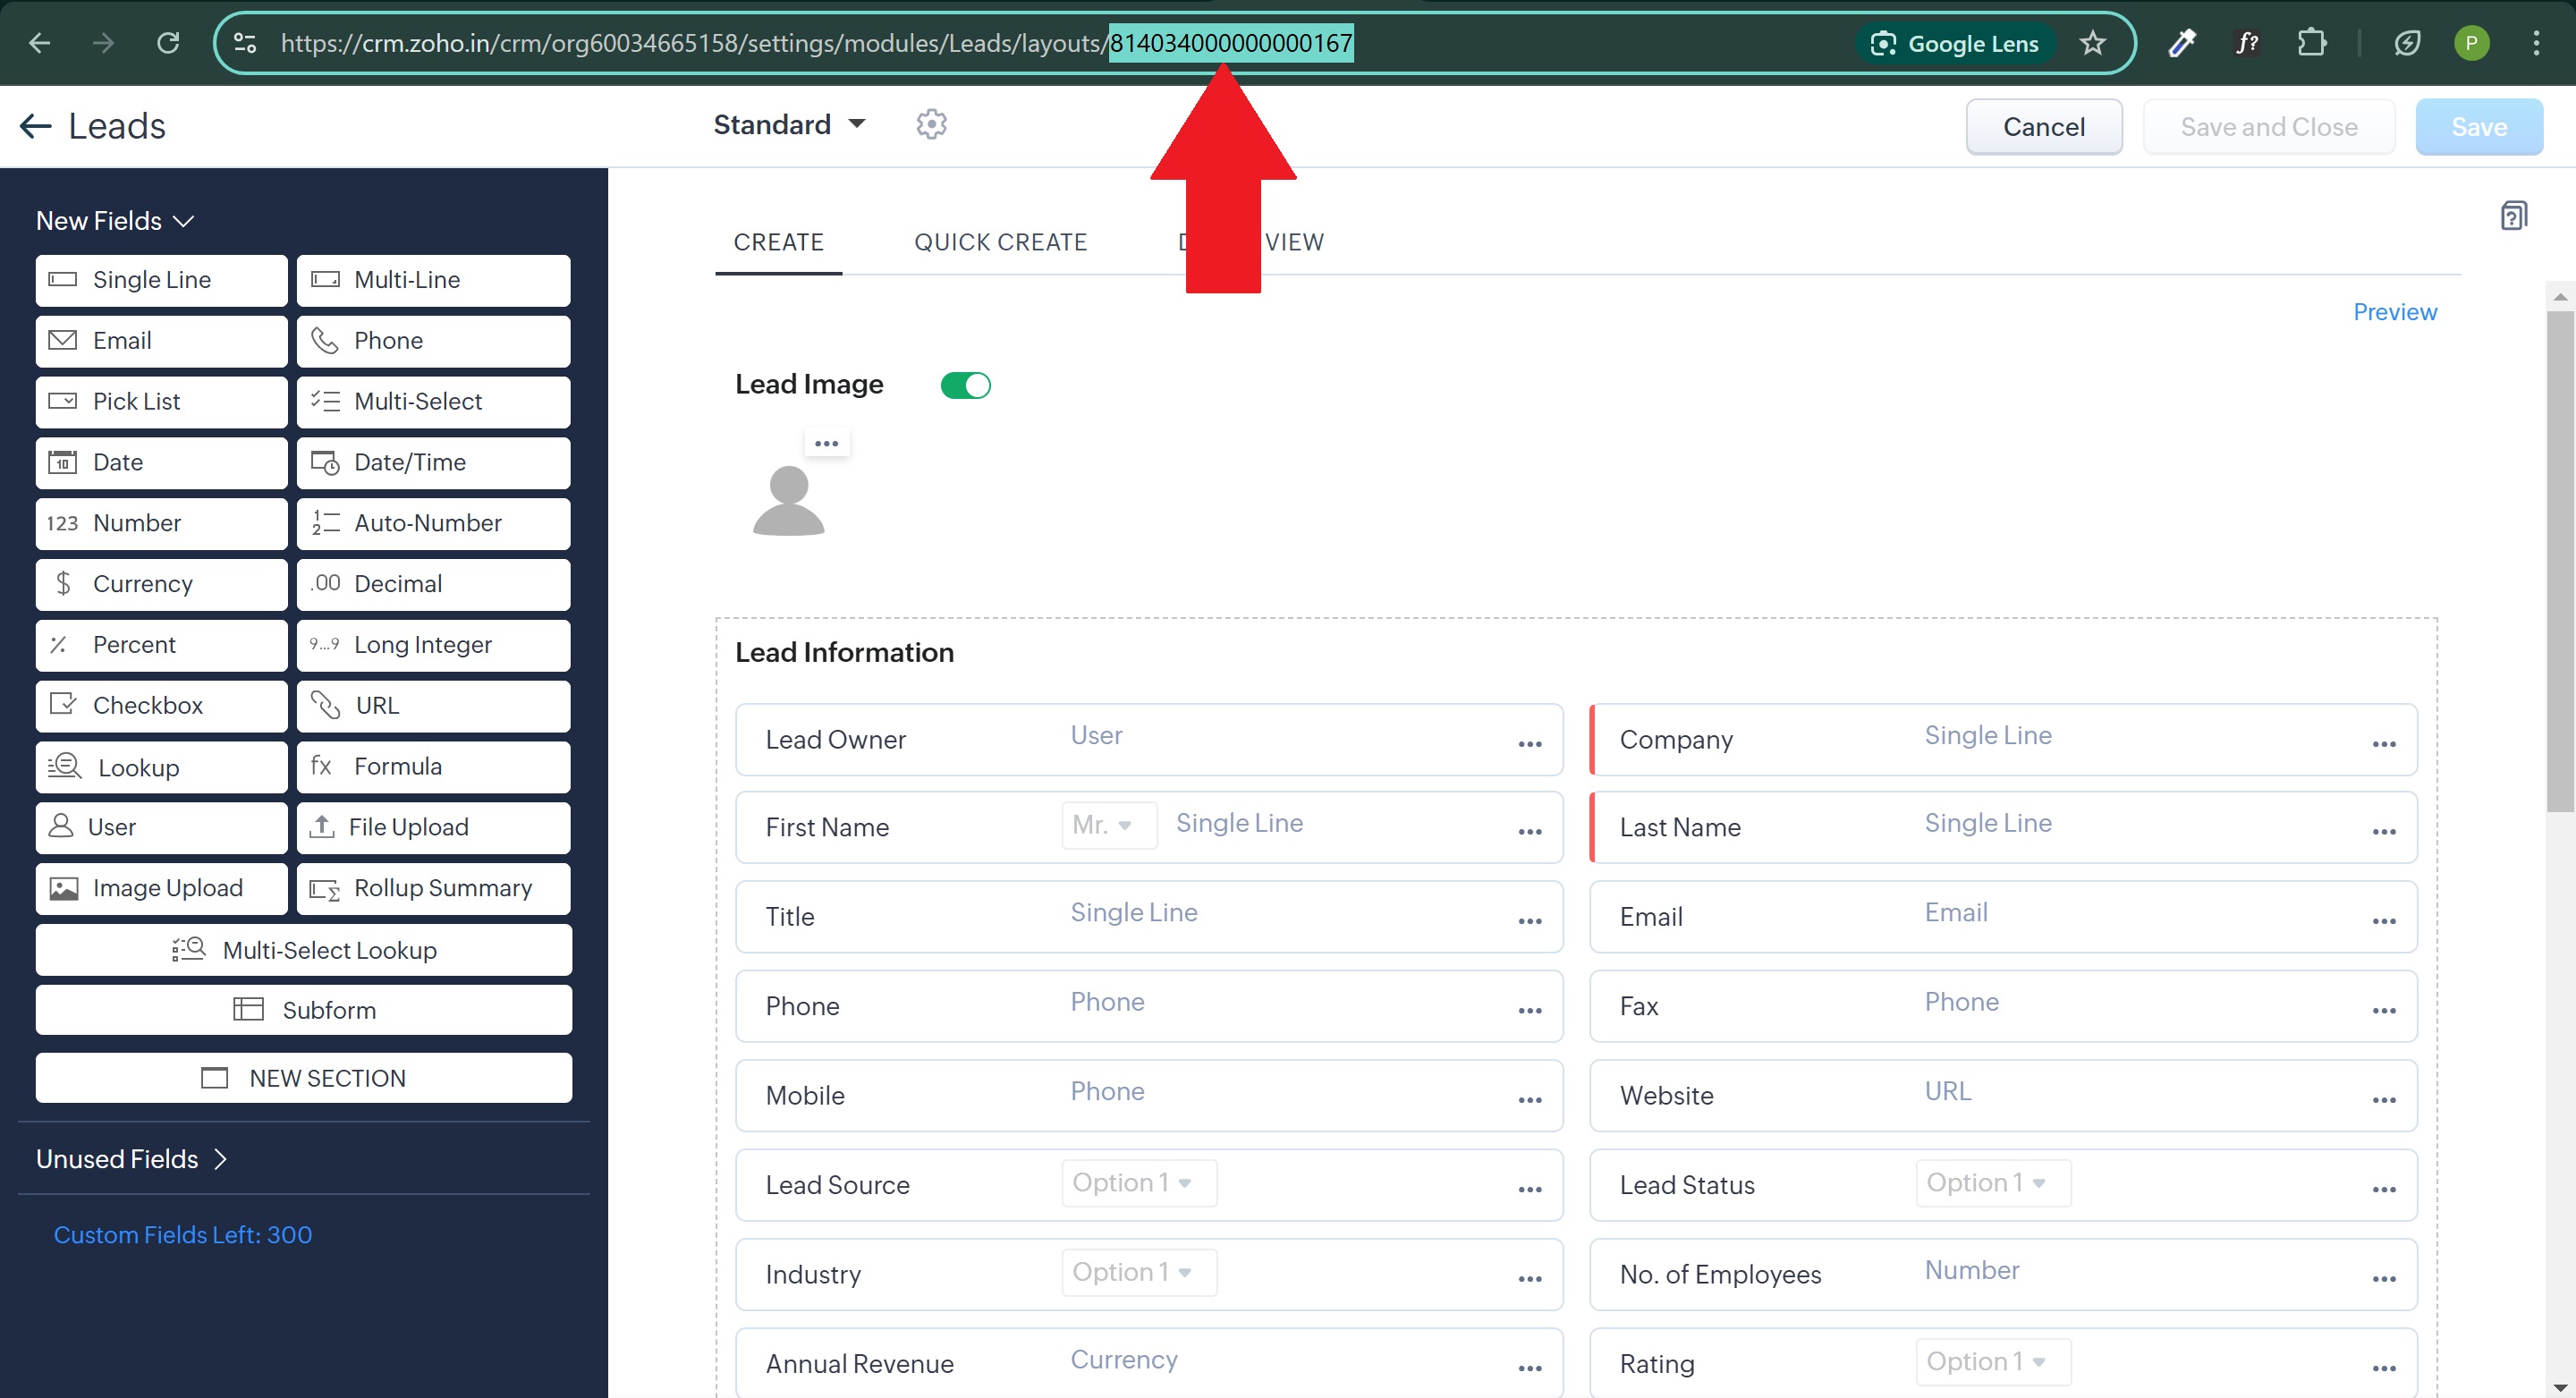
- After you select the leads layout, the selected layout page will open up.
Now select and copy the layout ID present in the current page URL as shown.
¶ Steps to get Client ID and Client Secret
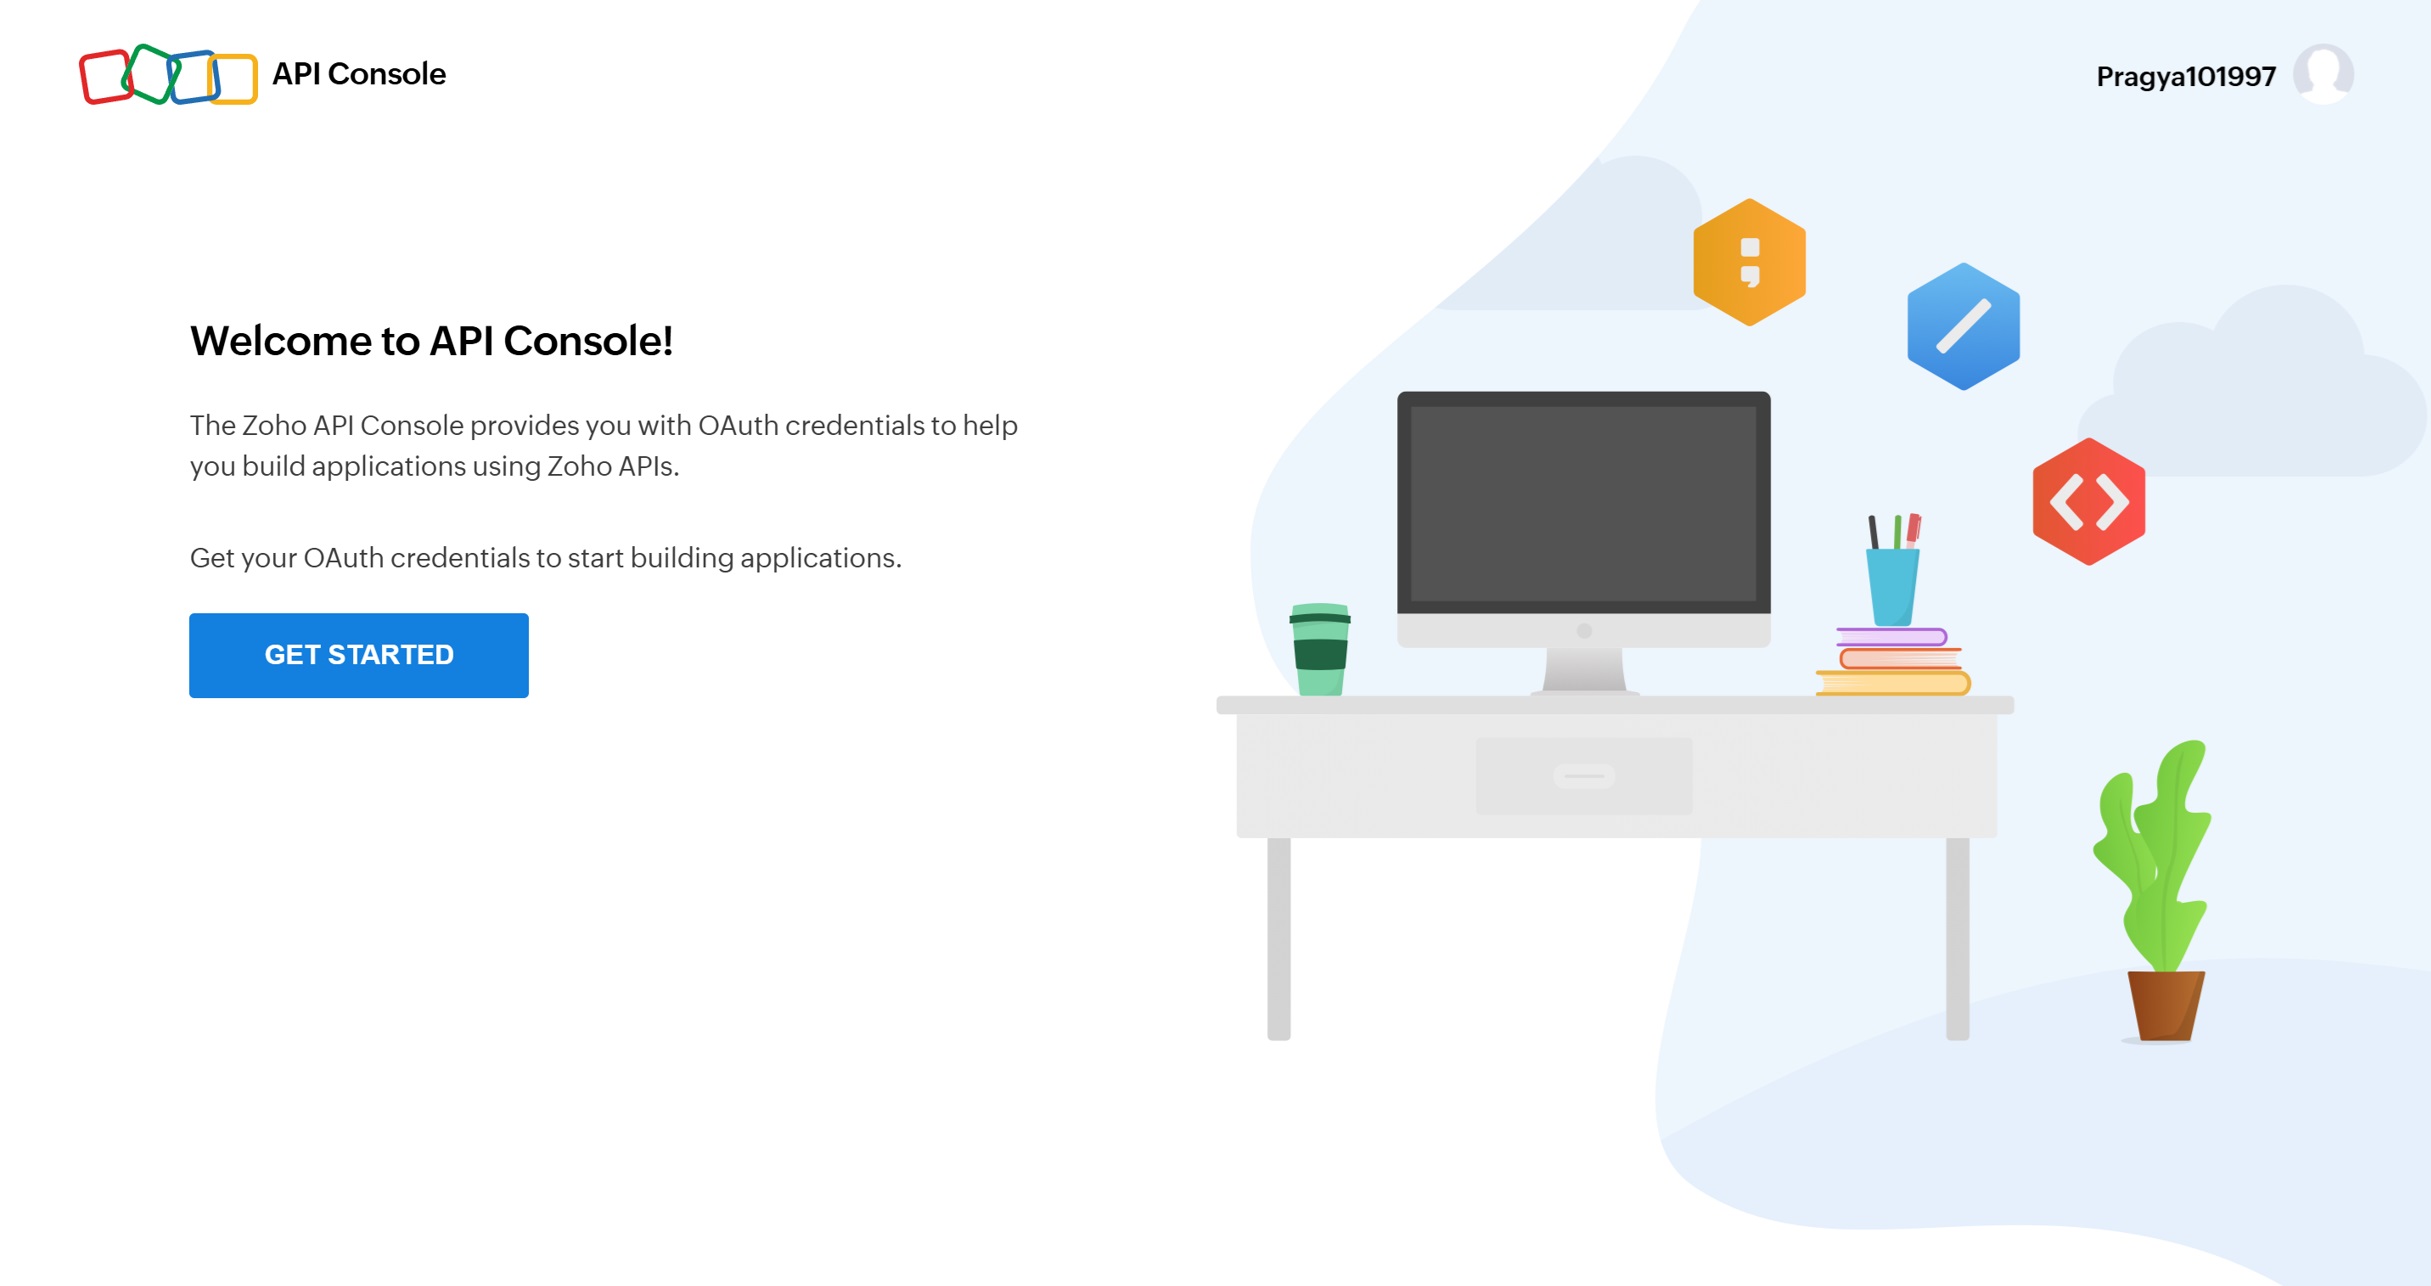
- Go to https://api-console.zoho.in and click on Get Started.
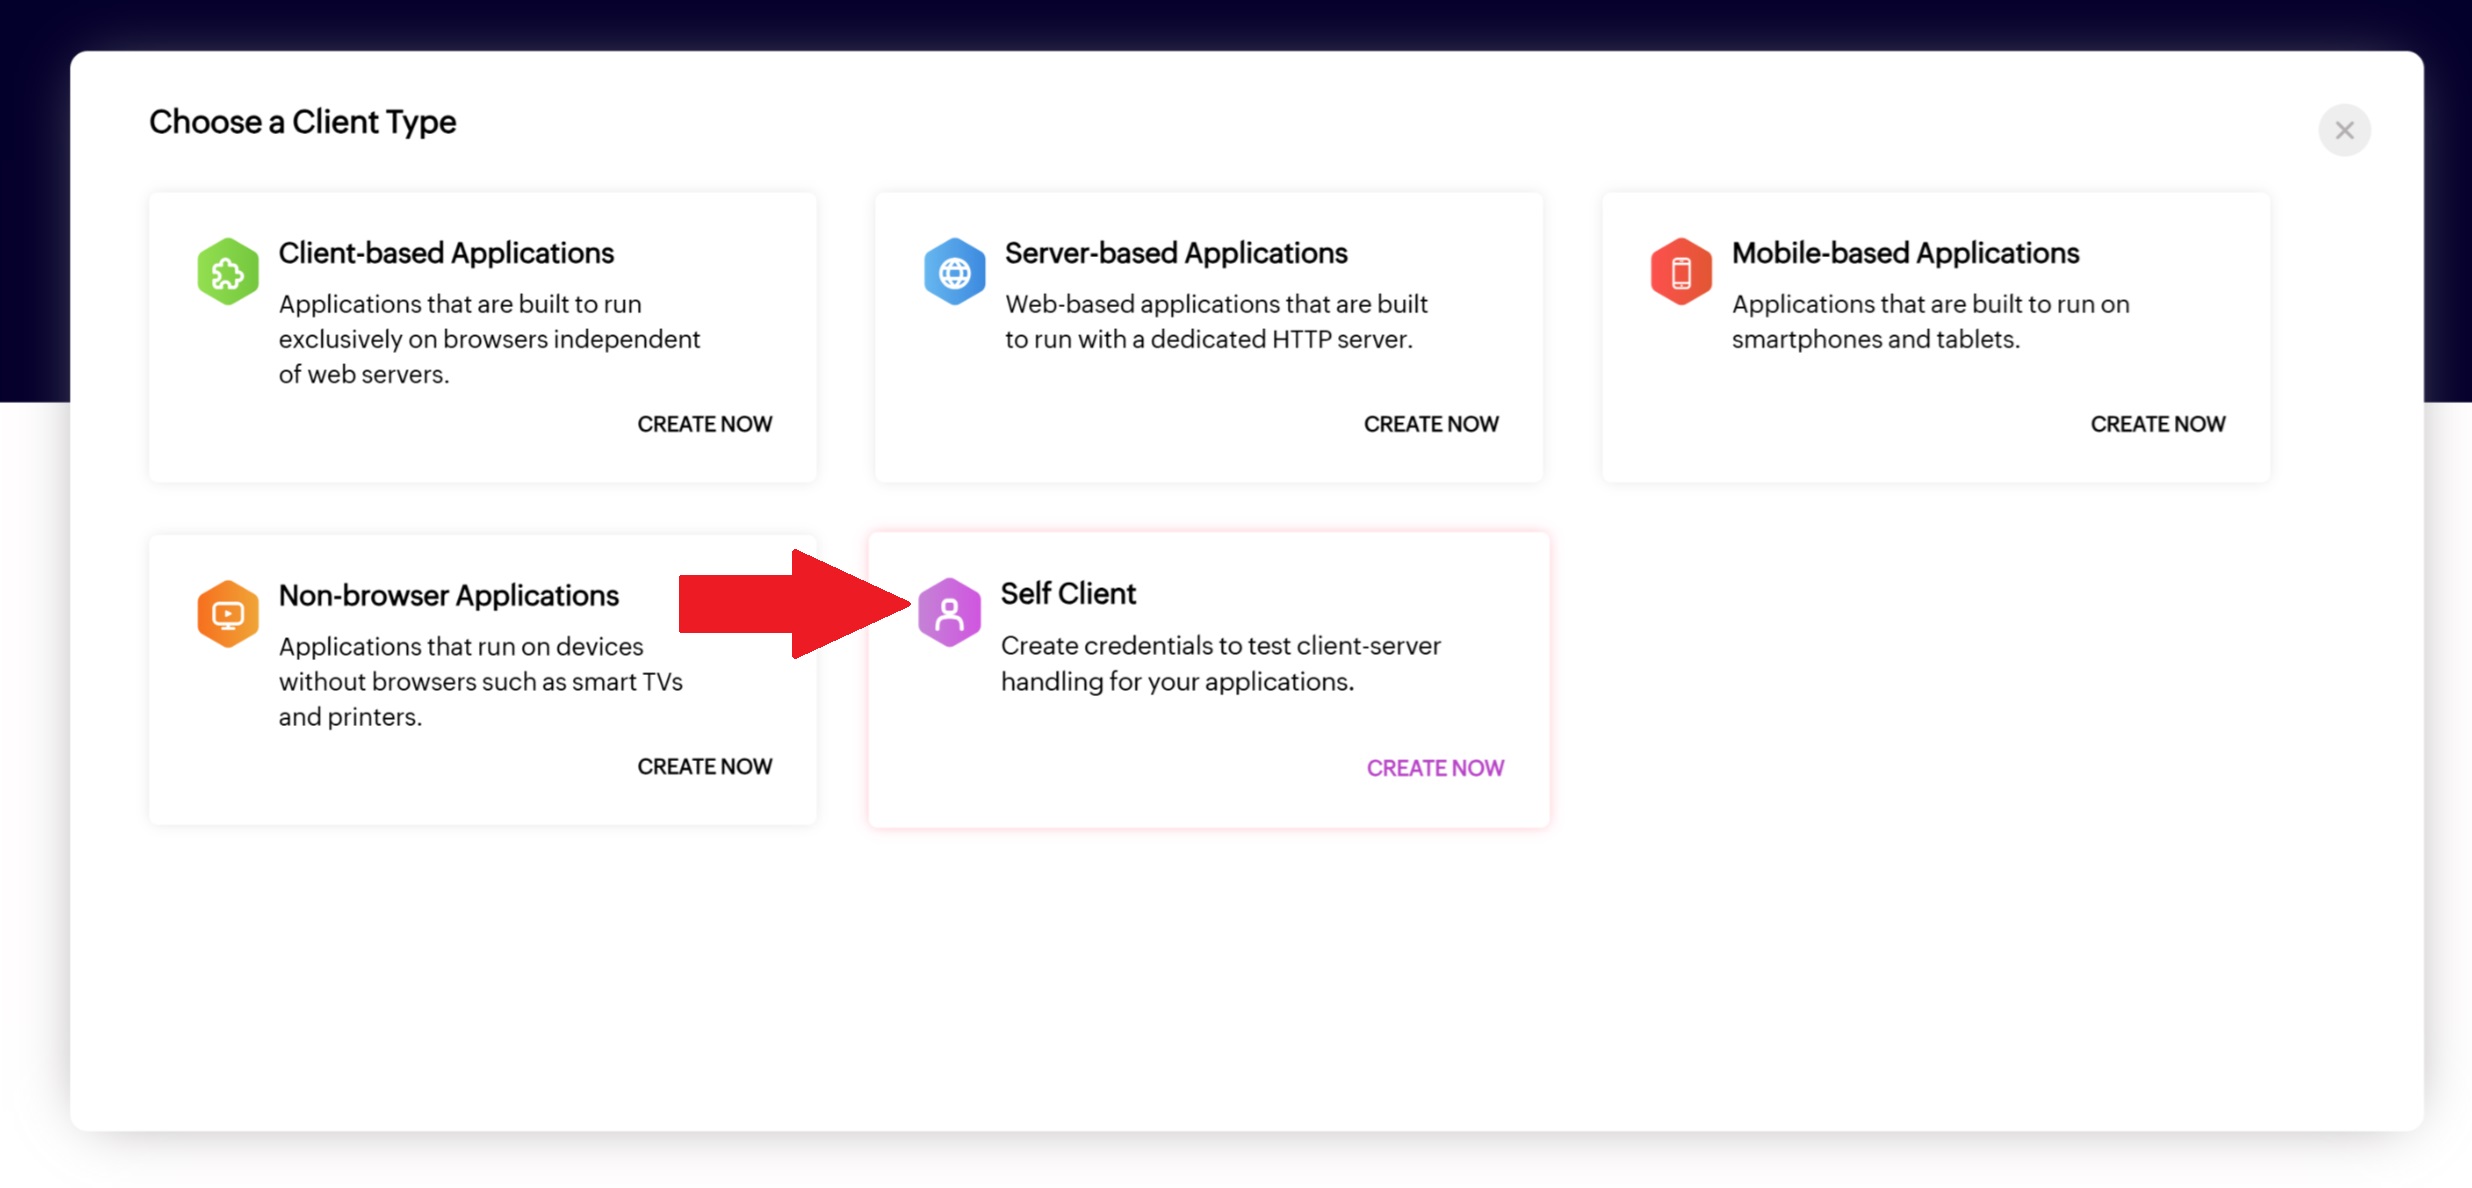
- Select Self Client under choose Client Type and click on Create.
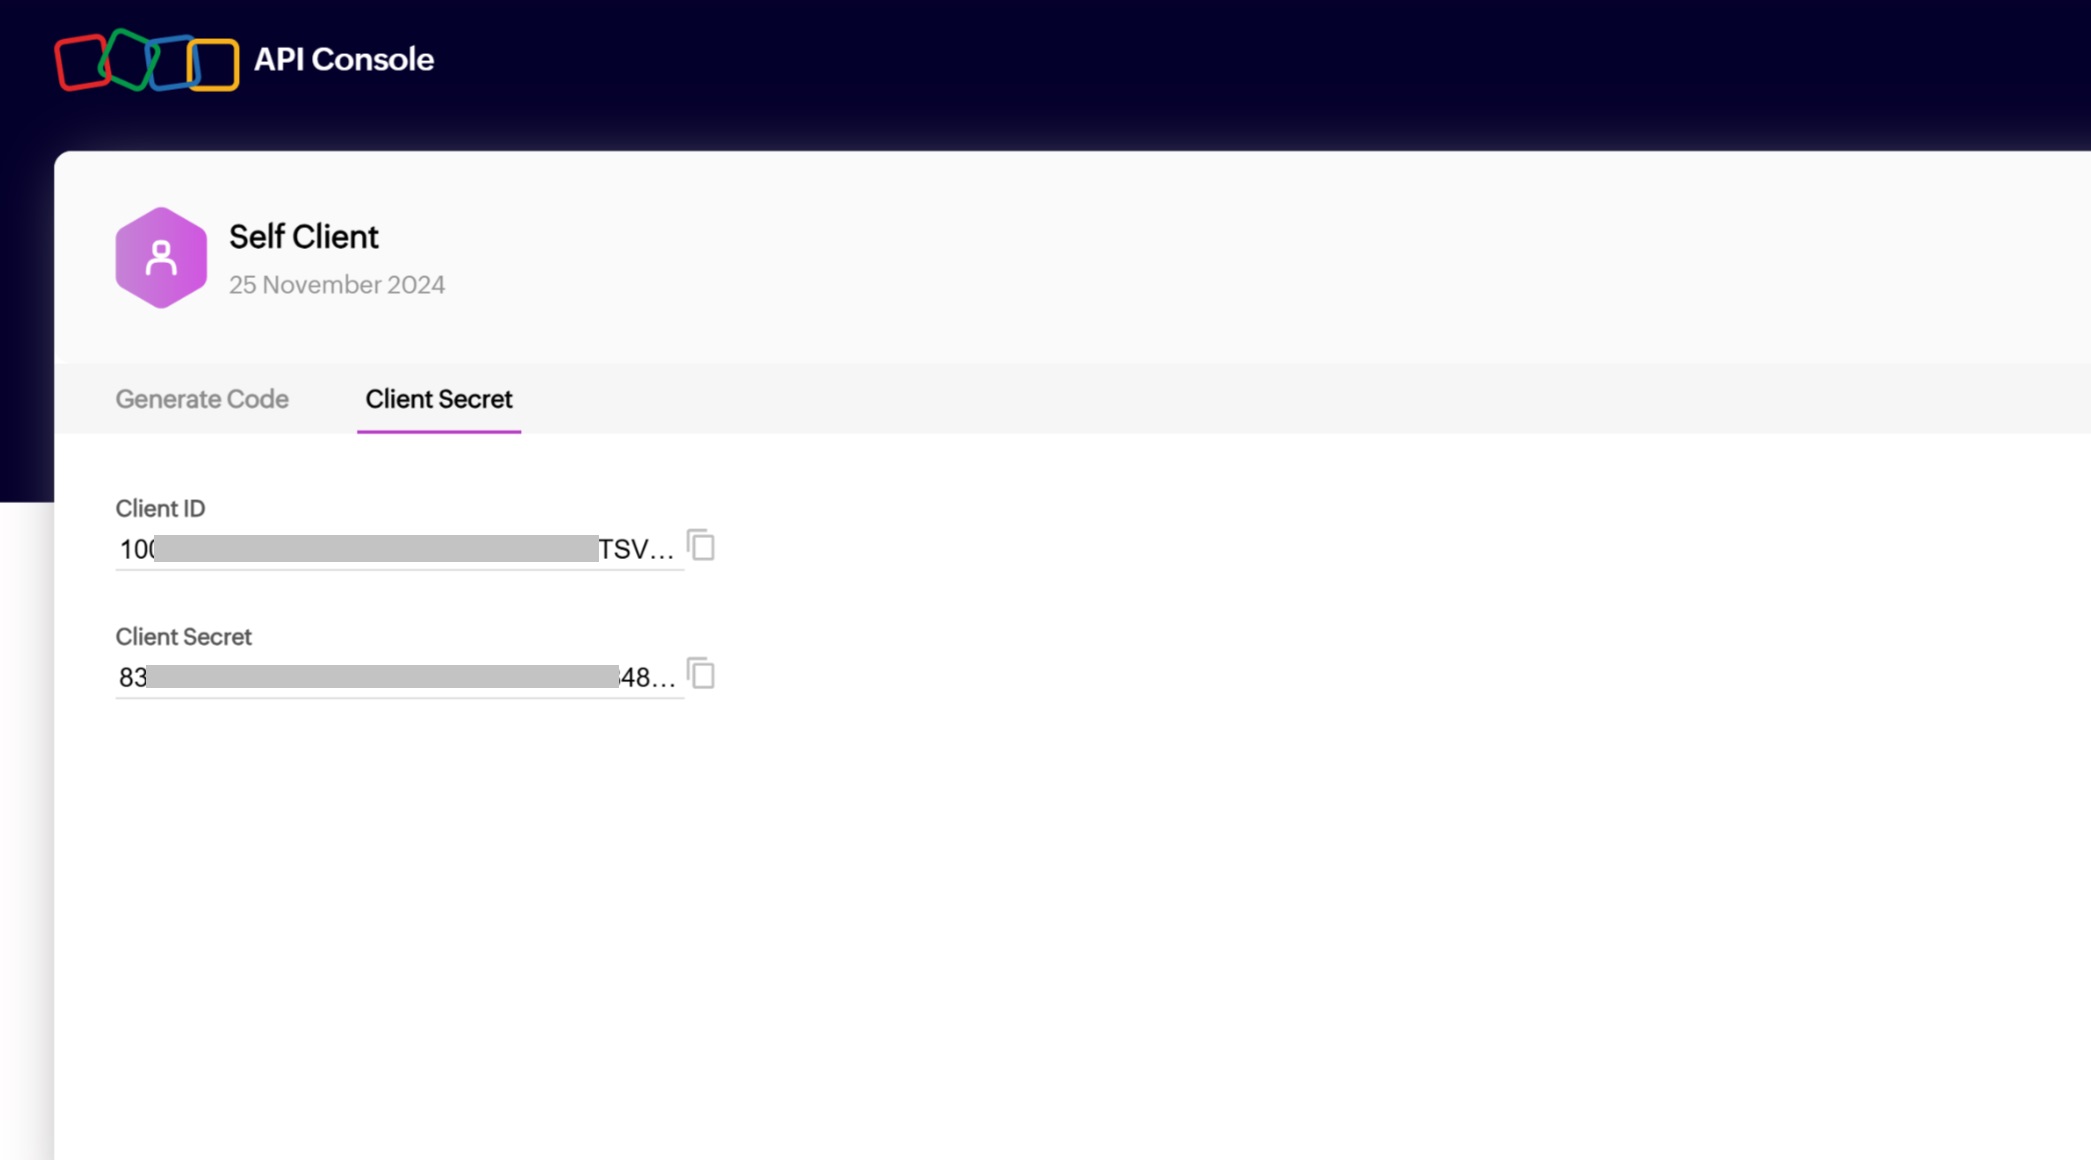
- Copy the Client ID and Client Secret from the Client Secret tab.
¶ Steps to get Generated Code
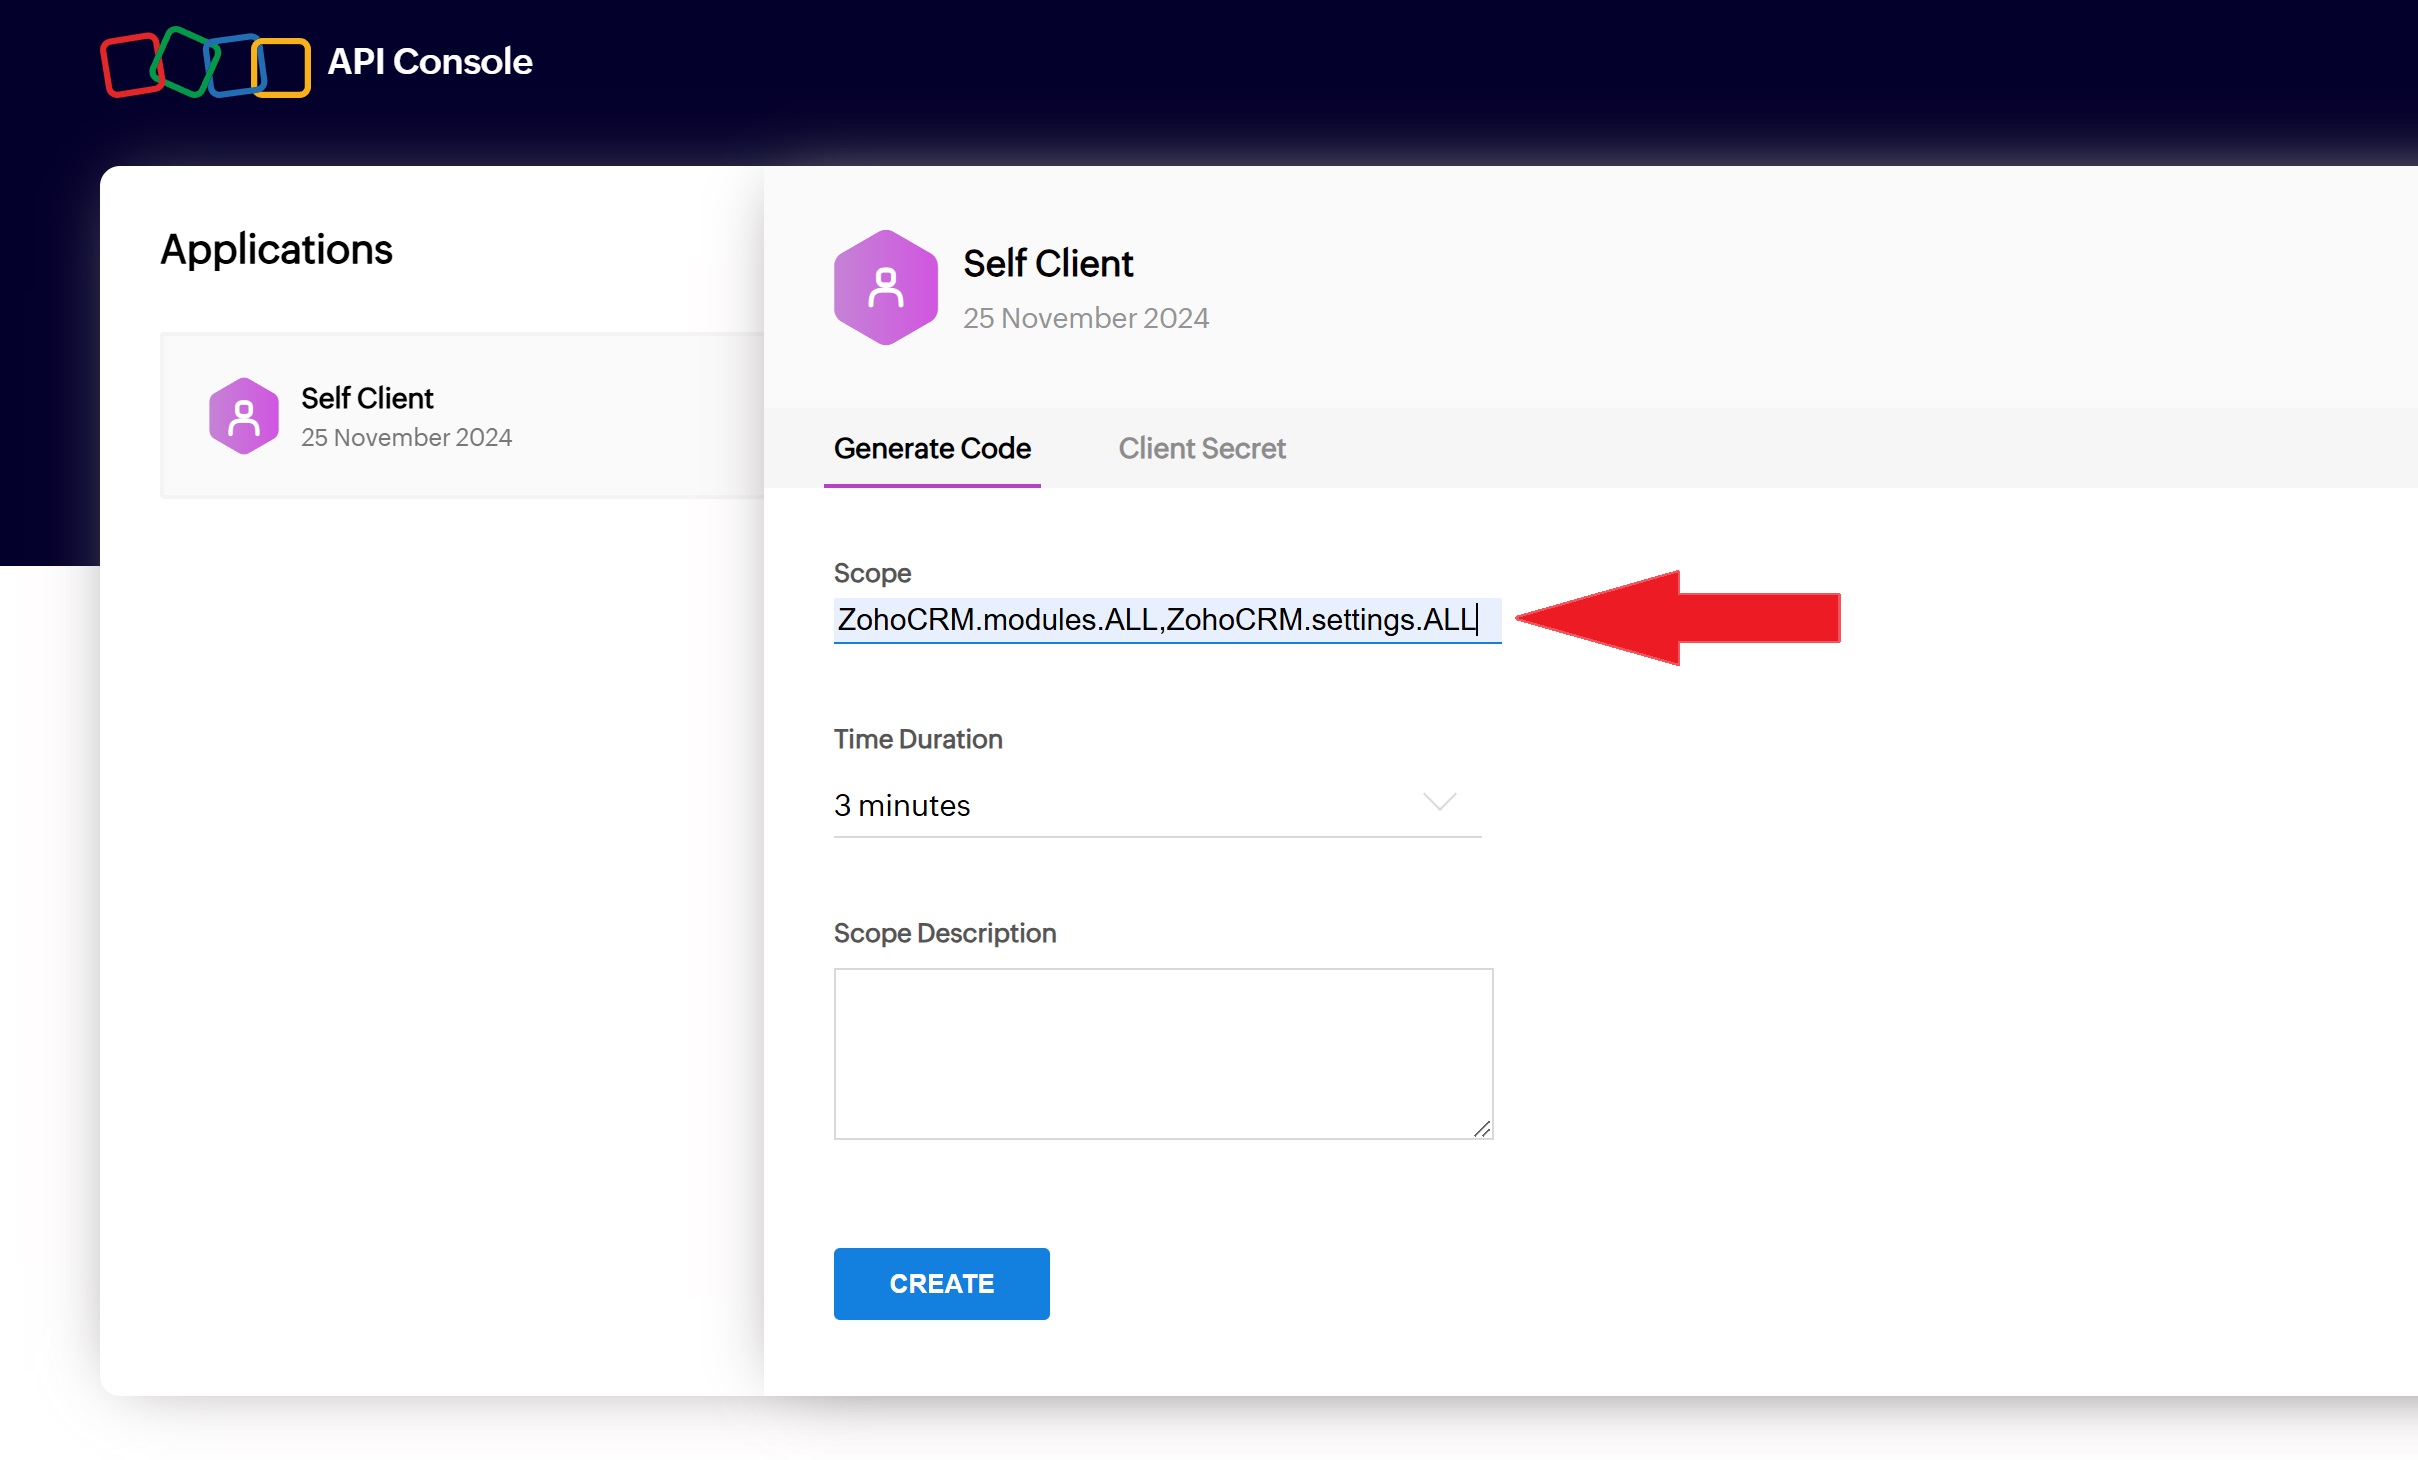
- After getting the Client ID and Client Secret, click on Generated Code tab on the Self Client page.
Add "ZohoCRM.modules.ALL,ZohoCRM.settings.ALL" in the Scope input box.
Choose a time duration and add Scope description.
After adding scope details, click on Create.
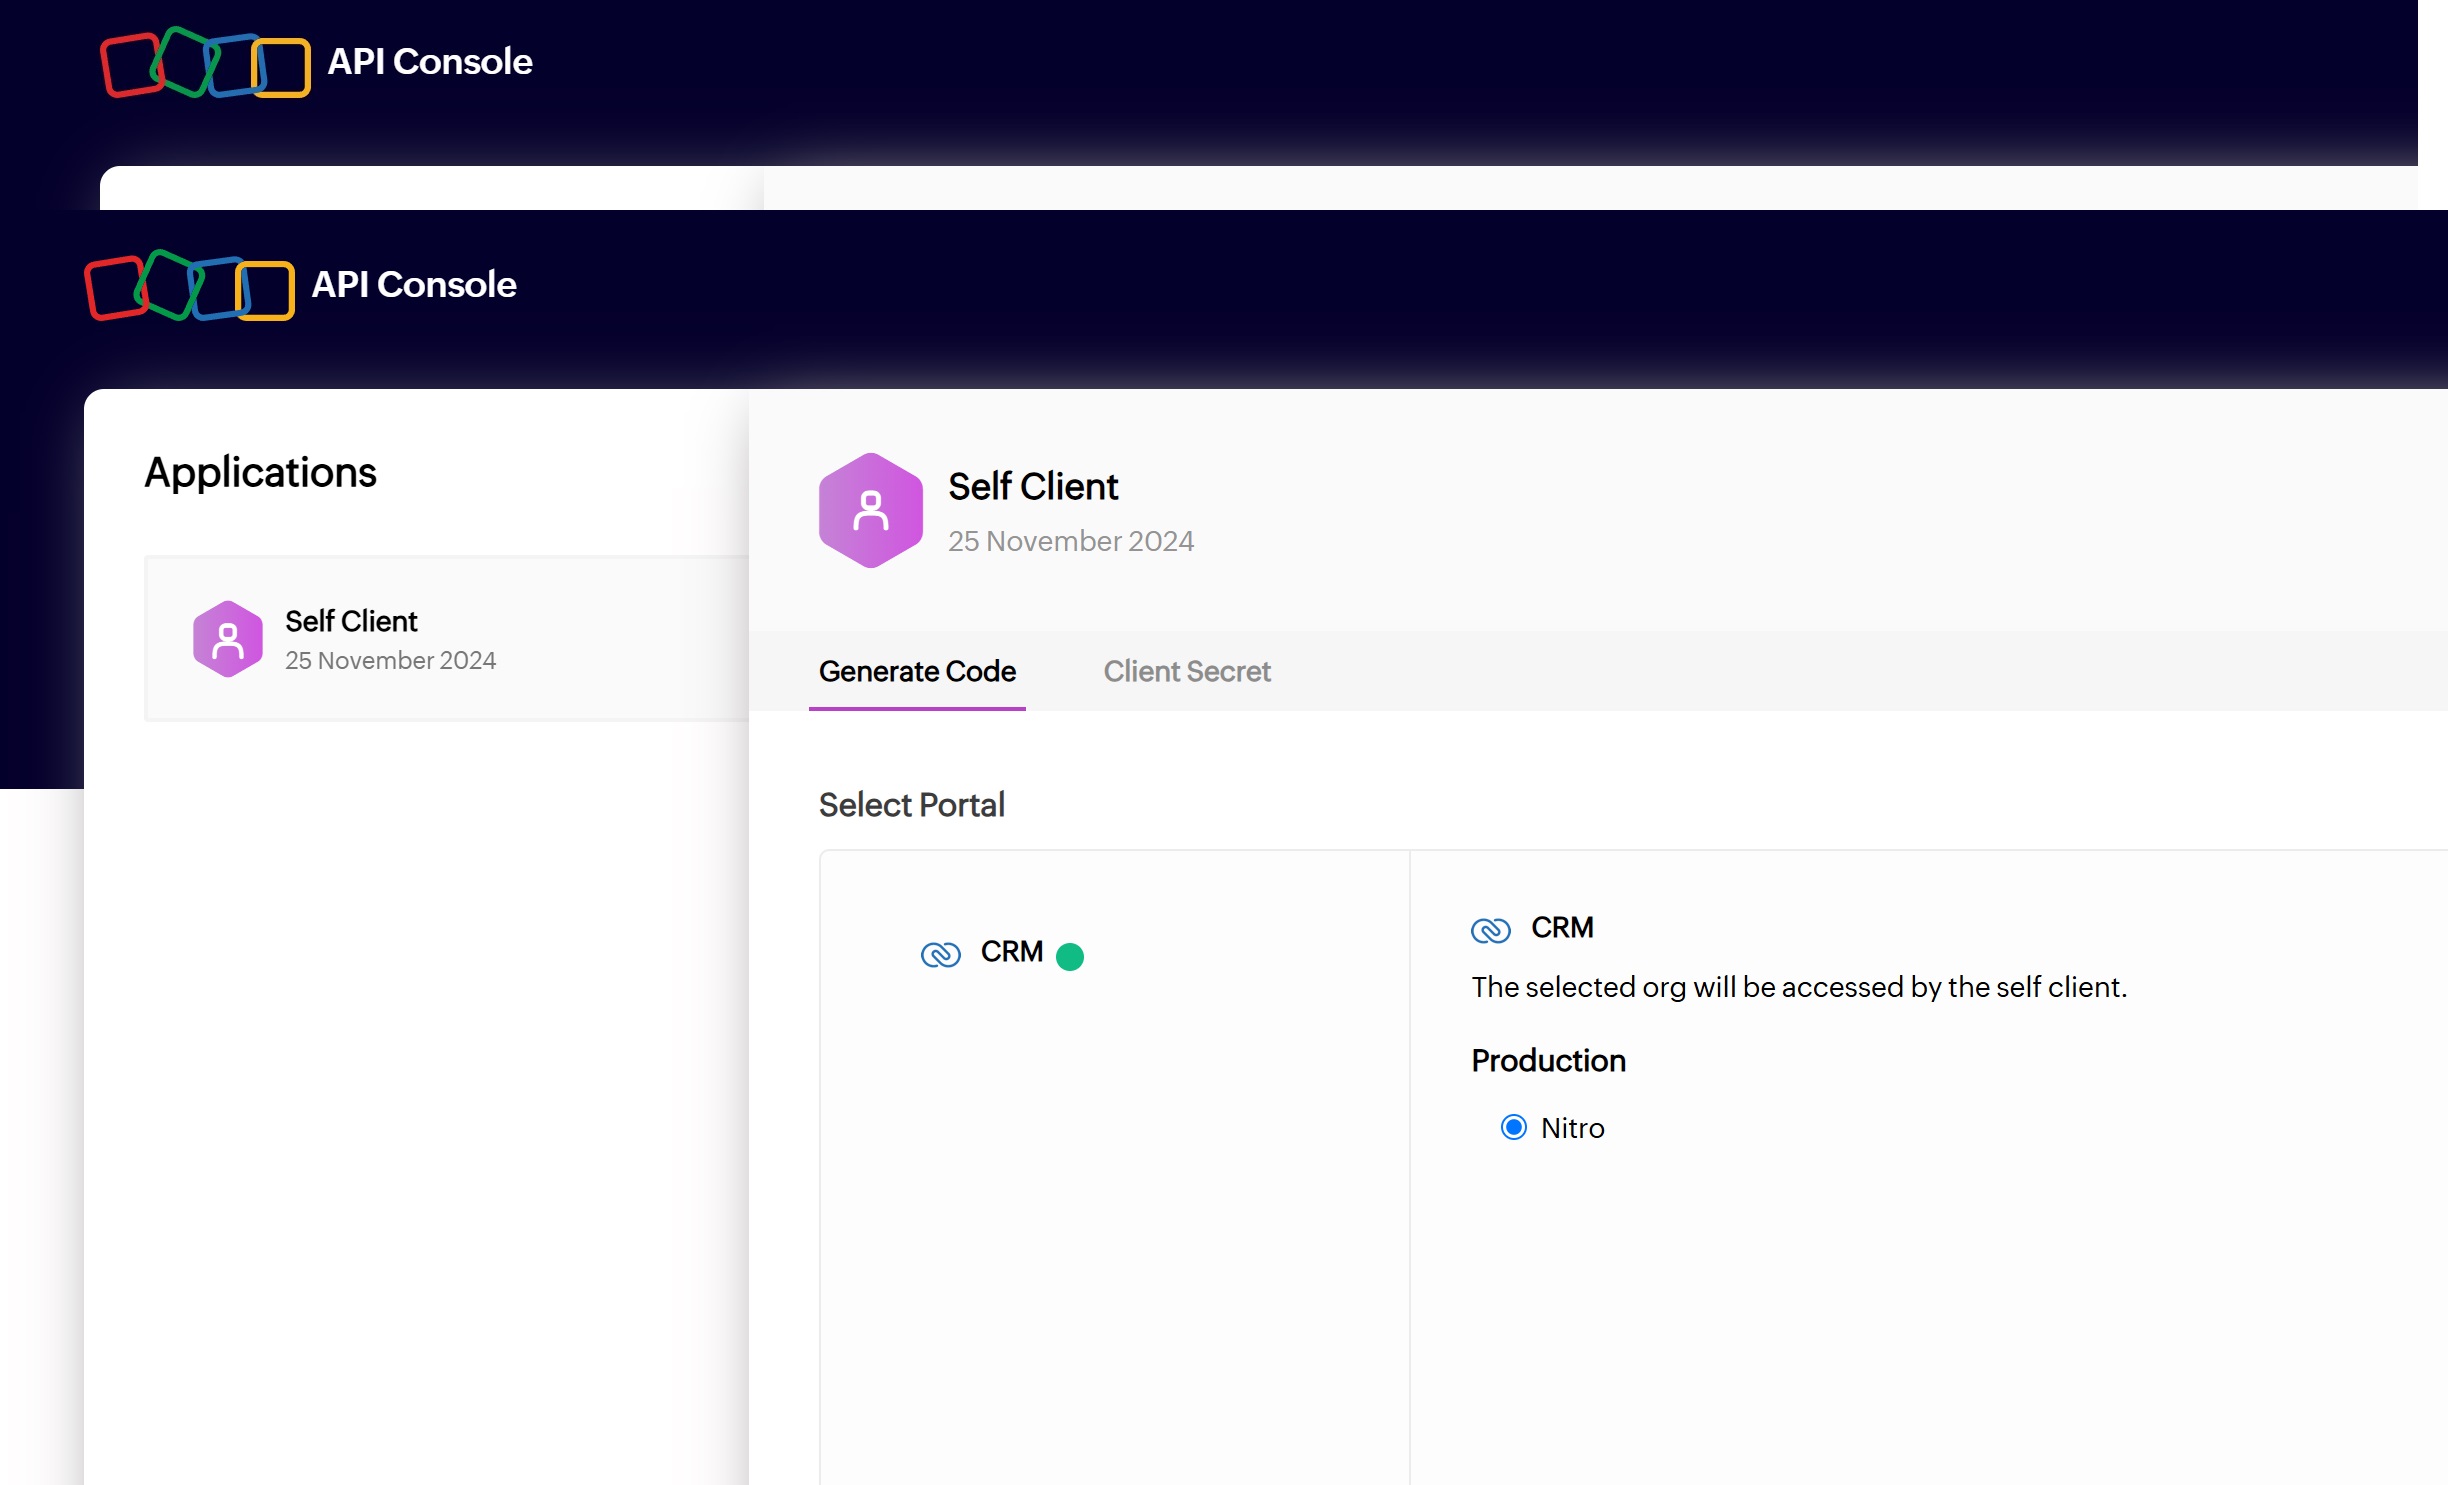
- Now select "CRM" option under Select Portal section.
Further, select your org under the "Production" section.
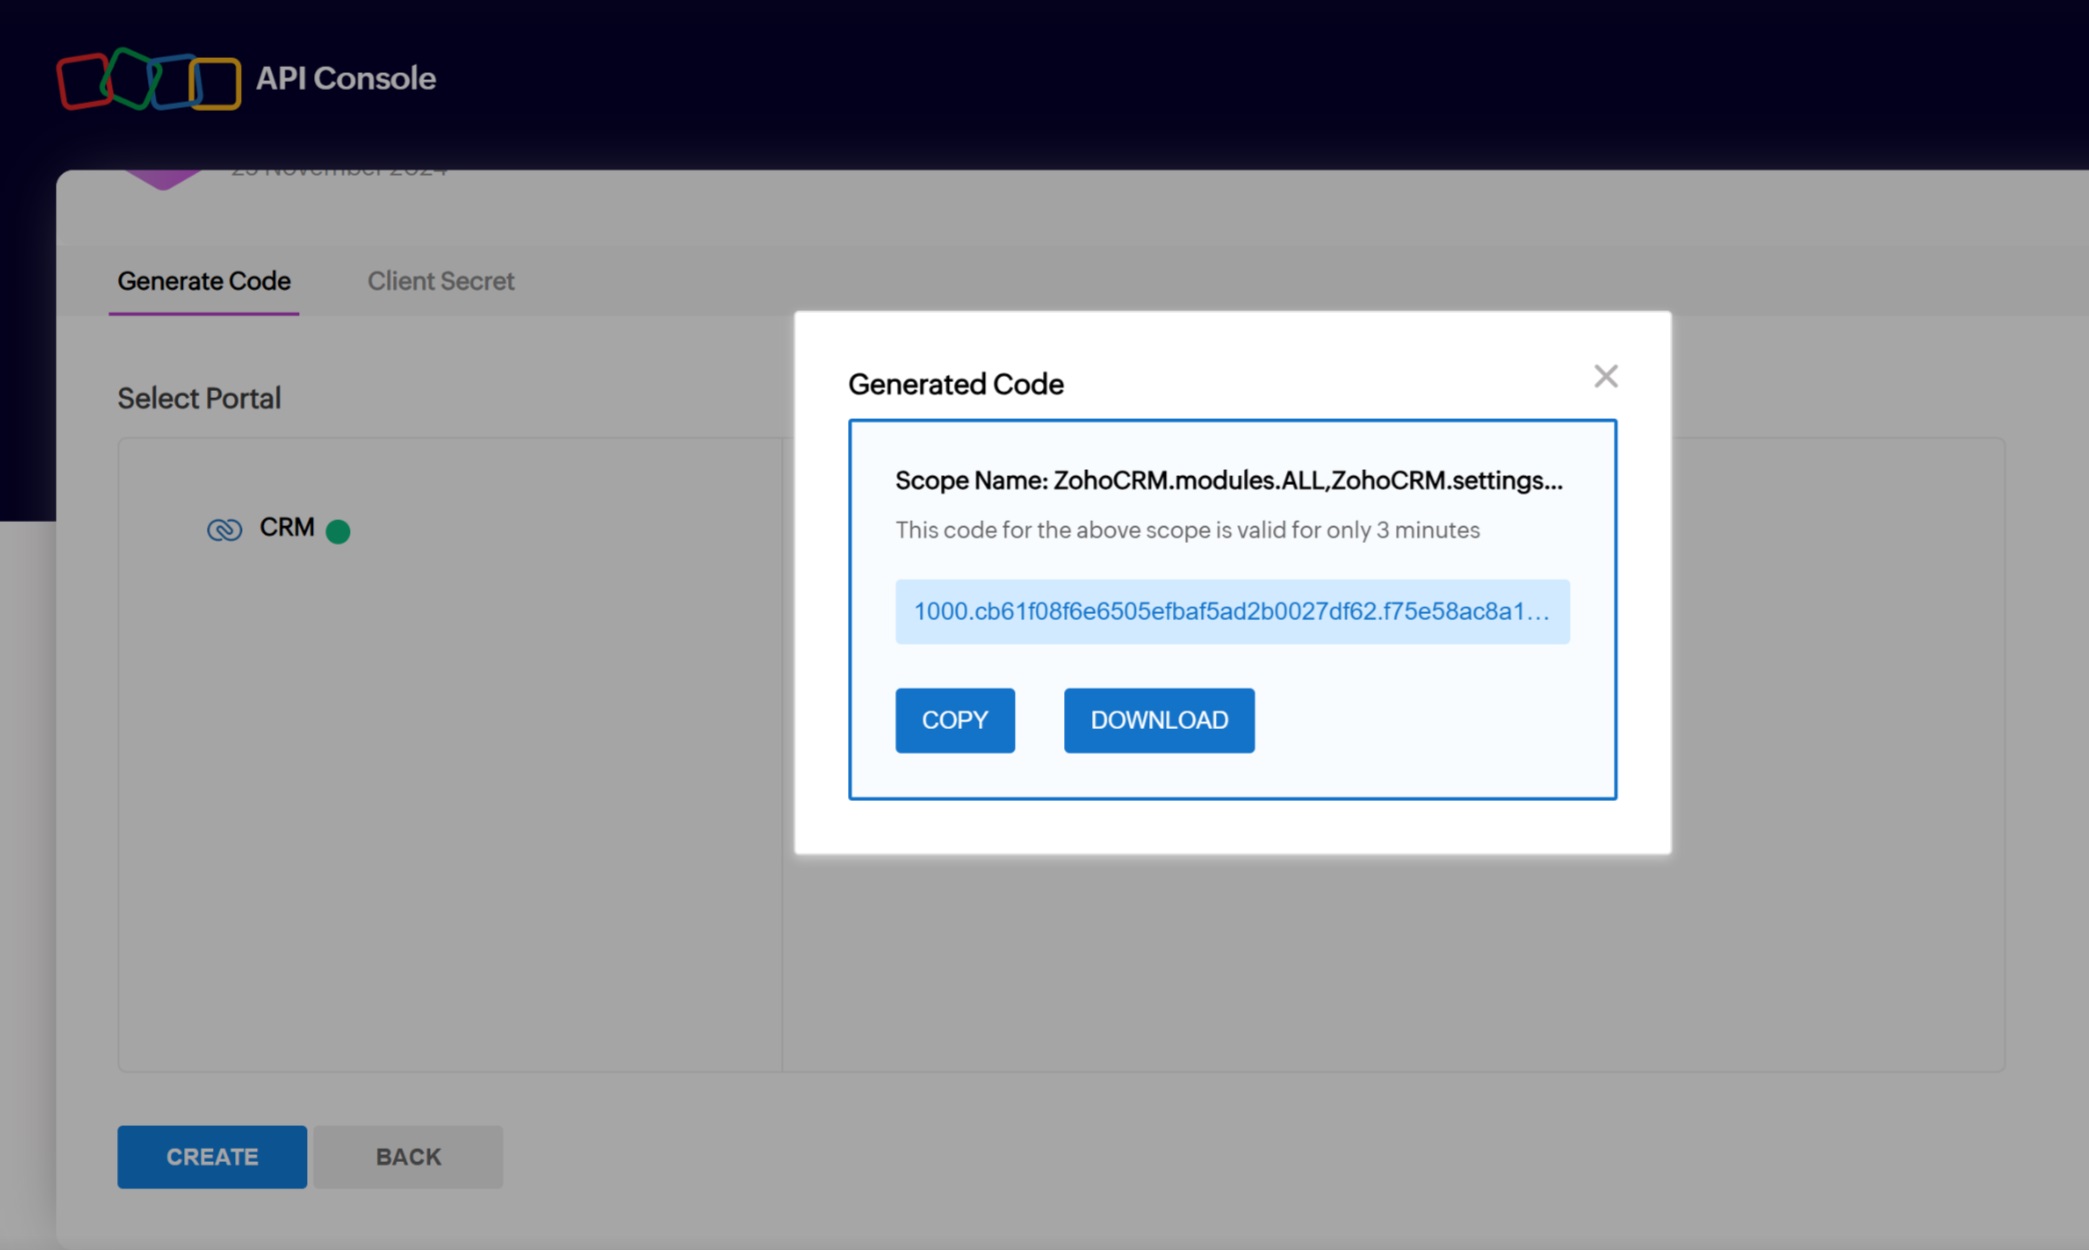
- Generated code dialogue box will appear. Copy this generated code.
¶ Integrating at Nitro
-
Login at https://x.nitrocommerce.ai and go to the Integrations tab. Now go to "Connect with Zoho" under the Platforms section.
-
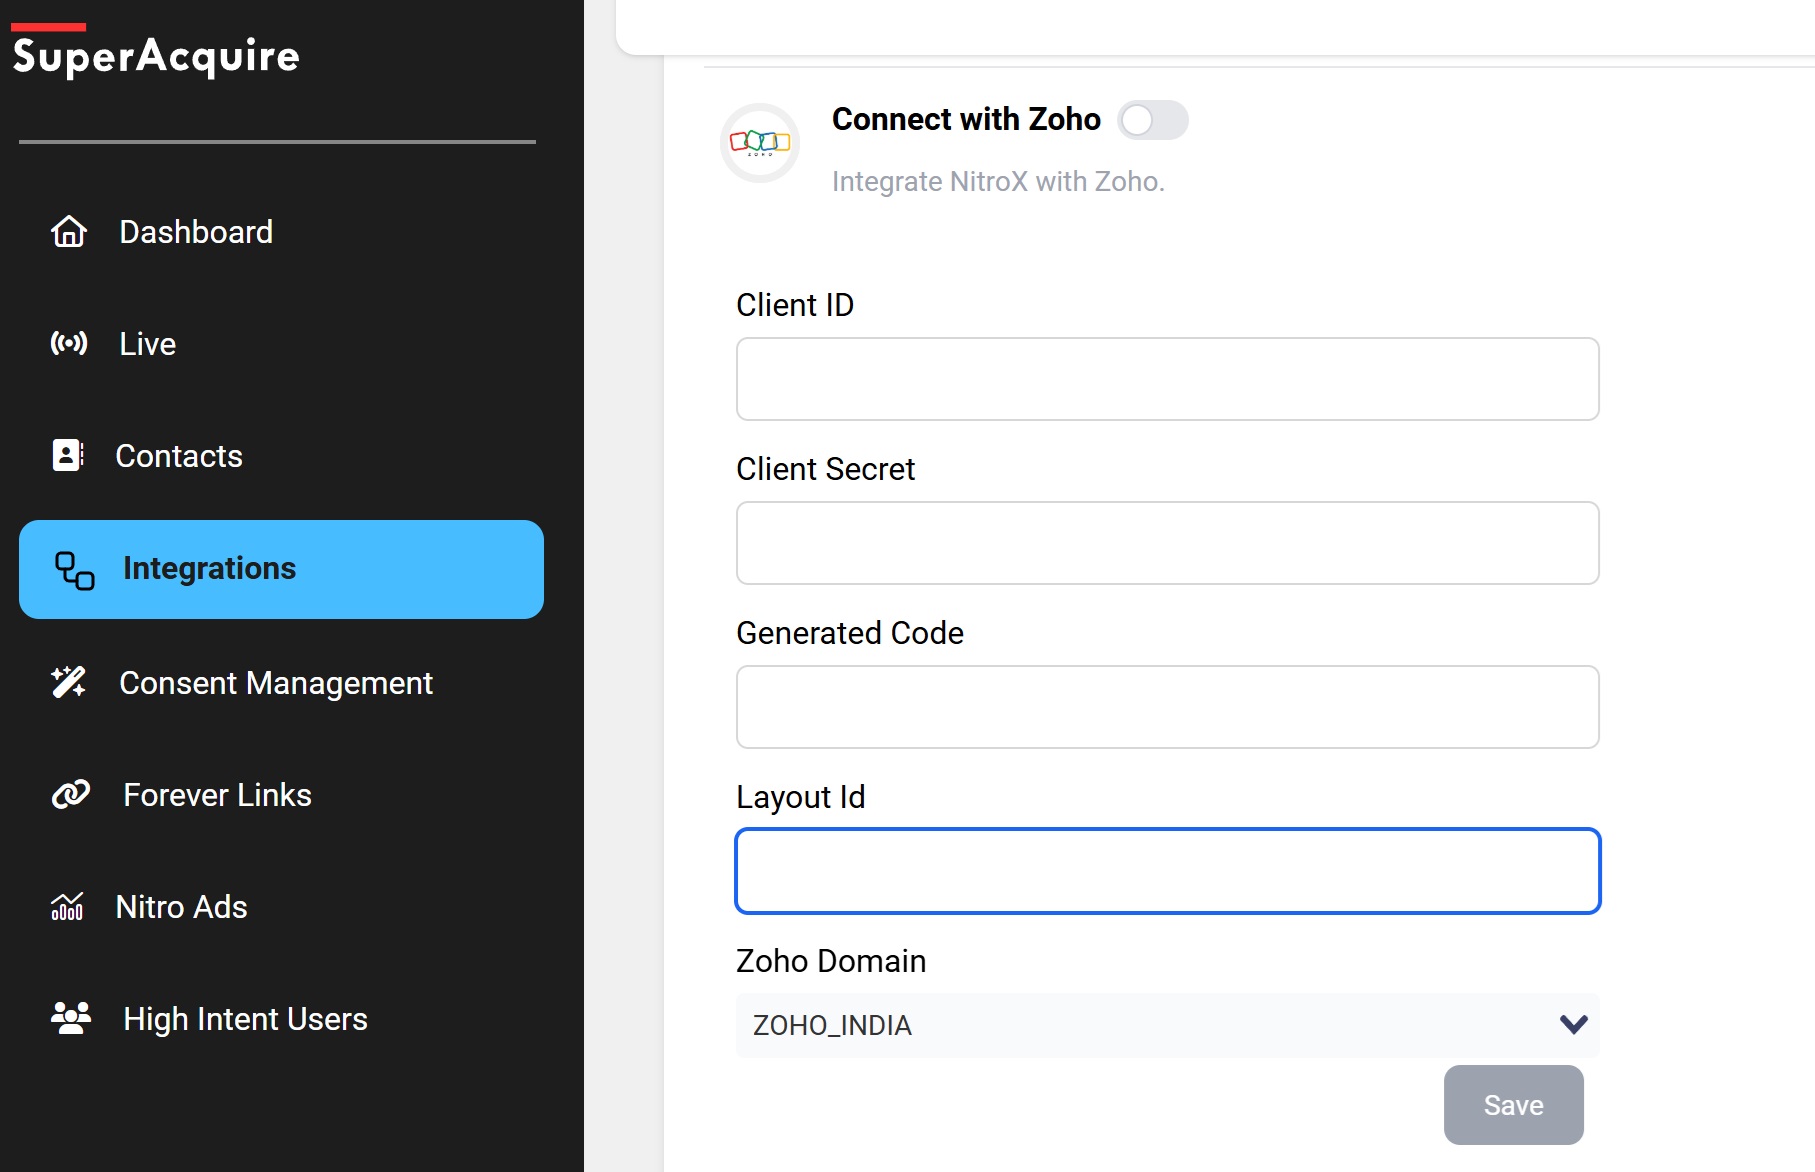
Click on "Connect with Zoho".
Now paste the Client ID, Client Secret, Generated Code and Layout ID which was obtained earlier.
Select "ZOHO_INDIA" under the Zoho Domain dropdown and Click on save.
You will see a toast notification upon successful integration.
Please Note:
Nitro identifies users on a daily basis and exports uniquely identified users to Zoho each day. Therefore, de-duplication of user data across longer periods must be handled within Zoho.